

Written by Melanie Howe
How to Make Animated GIFs of Yourself for Live Streaming
Adding animations and custom overlays to your live videos is not only an excellent engagement booster, but also a great way to customize your streams to match your brand. However, your brand is more than just a logo and colors. It’s an experience.
One way to create a fun and unique experience for your viewers is to add a little more YOU to your stream. So, let’s talk about putting an animation of yourself in your stream. You can do this by uploading a transparent GIF file to your overlays section in StreamYard.
That said, the tricky part is creating a transparent GIF of yourself. You can always hire a professional to do that, but I’ve got a scrappy method for the DIYer. So, if you’re wondering how to make animated GIFs, read on.
How to make Animated GIFs of Yourself for Live Streaming
Let's walk you through the steps to create your very own transparent GIF of yourself that you can use in your live videos.
In a nutshell, here’s what you’ll need:
- A way to capture a video of yourself
- An app to create your overlay design video
- A tool to remove the background from your video (we’ll be using Unscreen Pro)
- The ability to convert your transparent video to a GIF (we’ll be using Unscreen Pro)
Step 1: Capture a Video of Yourself
You can do this at your computer or use your mobile phone. If you don’t own a tripod for your phone, have someone help you. But make sure that it’s done with a steady hand to avoid a shaky video.
Here are a few tips to get a video that will work best.
The background. Use a solid background that provides some contrast to you and what you’re wearing. You may think a green screen is required, but it’s not. Any solid background will do because the app we’ll use to remove the background doesn’t use a chroma-key (we’ll get to that part later, though). However, if you own a green screen already, go ahead and use it.
Pro Tip: Learn more on live stream backdrop ideas here.
Keep it short and remember the loop. When you’re learning how to make animated GIFs, remember that these clips need to be quick and sweet to keep the file size down. Also, try to begin and end your clip with the same pose and expression. The animated GIFs will play on a loop. So, if you can get the end of your clip to match the beginning closely, there will be less of a “jolt.”
Step 2: Create your Overlay Design
Now that you have a video, let’s get to creating the overlay design. This is essentially you deciding how you want your video to show up in your stream.
Most of your standard overlays are in a transparent PNG format and are static. However, for your overlay to be animated, it must be in GIF format. We’ll start by creating a video file.
Use an app to design your overlay video file. Canva, Wave.video, Microsoft PowerPoint, or Keynote are just a few that will work great. You’ll want to export your design in MP4 format.
When you’re creating this design, you’ll want to consider the layers of your stream. Do you pull up comments and banners during your streams? It’s essential to consider these elements and where they show up.
In StreamYard, for example, when you display a comment or banner, it will show in front of any overlays you have added to your stream. In other words, if your overlay is in the same area as the comments or banners, it will be covered up. This is fine as long as you’re not planning to show the animated overlay while you’re displaying comments or banners. But, if you are, then consider this when designing.
Ideally, your overlay design file should be the same ratio as your live video, which is 16:9 (1920p x 1080p or 1280p x 720p).
Now, let’s move on to the much important part: how to make animated GIFs!
Step 3: Create a Transparent GIF File
Once you have your design, you need to remove the background and create a transparent GIF file. You can use design programs in Adobe Creative Cloud or even hire someone to do this. But if you’re looking for a DIY version, consider using Unscreen Pro, which also doesn’t require a green screen background for your original video.
Unscreen Pro allows you to upload a video or GIF file, automatically removing the background. Now, this tool doesn’t always yield perfect results, but it provides a preview of your file. Be sure to check that it removed the background to your standards.
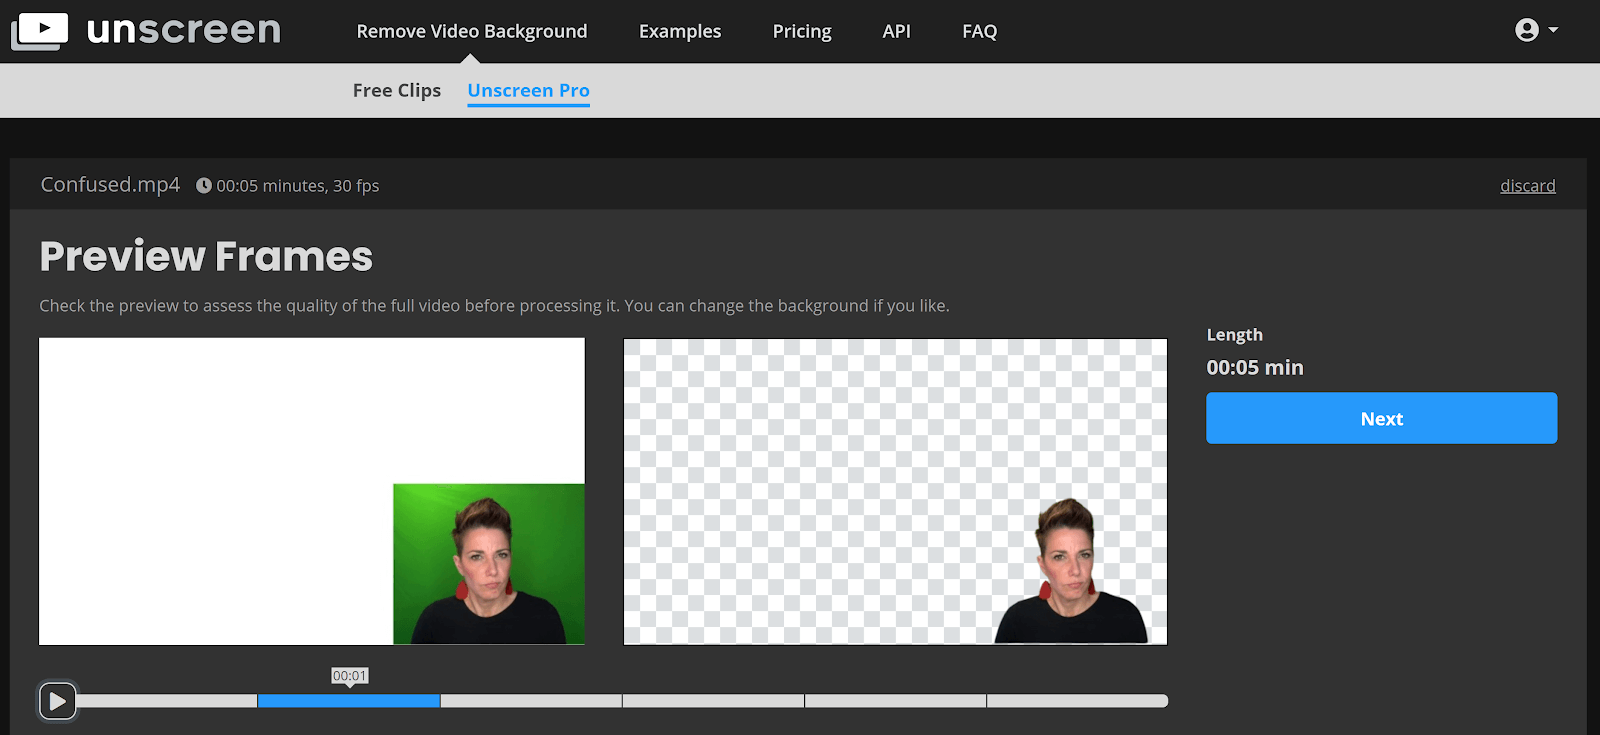
Unscreen Pro provides this recommendation for videos that work best with their tool.
“At the moment Unscreen Pro works very well for videos of people, animals or objects that are clearly the primary subject (i.e. in focus, staying in the scene, separated from background). However, some videos are more challenging than others. When uploading your video for free, we recommend taking a close look at the preview frames to get an impression of the quality level you can expect before you process the video.”
If you’re pleased with the preview of your transparent video, you’re ready to export the GIF file. Simply select “Next” on the screen and follow the prompts. Once your file is ready, you can download the GIF file.
Step 4: Optimize the GIF File
Now that you’ve learned how to make animated GIFs, comes optimizing. In fact, you may not even need to optimize your file. However, most streaming apps that accept transparent GIFs as overlays have file size limits. So, be sure to check your file size in comparison to those limits.
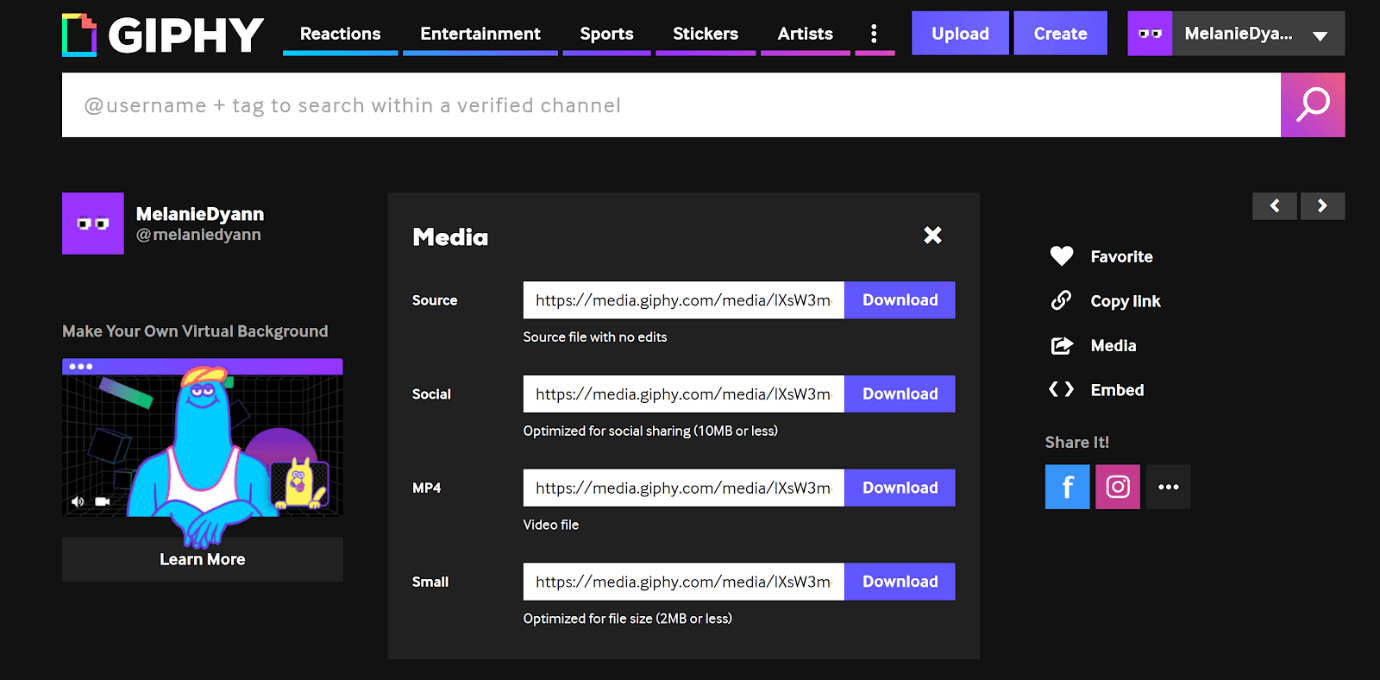
StreamYard currently only accepts GIF files that are under 3MB. So, if your transparent GIF is 3MB or more, you’ll need to get an optimized version. There are optimizing apps you can use, but another trick is uploading your file to GIPHY and downloading the social media version.
Step 5: Upload your Animated GIF and have some fun
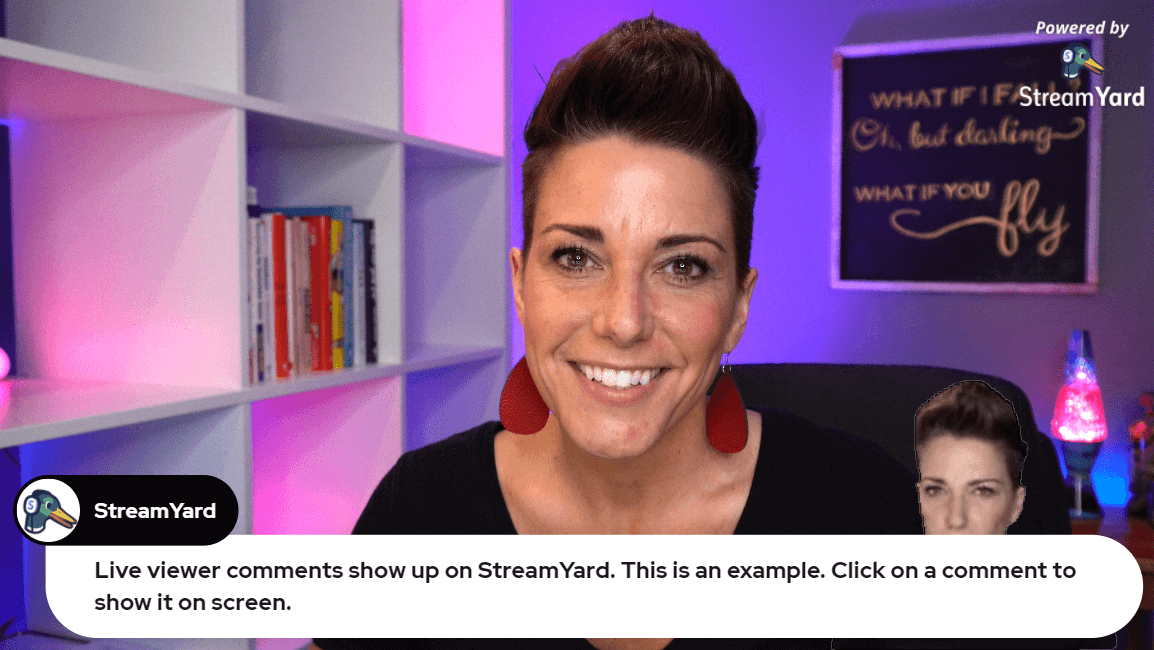
Now you’re ready to use your animated GIF in your live video. StreamYard makes this super easy. Upload the GIF file to your overlays section, and you’re ready to go. Now you can add and remove your animated GIF to your live video.
Bonus Tip: You can also upload animated GIF files to the “logo” section in StreamYard. Just remember it’s displayed much smaller in the top-right.
Now You’re Ready
We hope this post helped you learn how to make animated GIFs. I have to admit, using animations of myself has been a lot of fun, and my audience loves it. When you create animated GIFs of yourself, you can use them in your streams as well as in comments on social media.
If you have other people who are part of your life, business, or group, consider adding animated GIFs of them as well. This is a great way to add some sparkle to your live videos that will be unforgettable for your audience.
And, hey, if you're a video content lover like us, check out this video to easily incorporate animated GIFs into your live streaming strategy:
So, tell us, what kind of animated GIFs will you be adding to your streams?