

Written by StreamYard
How To Record A Podcast (Step-by-Step Guide)
Podcasts have become an incredibly popular way to distribute content. So, it’s no surprise that standing out against the sea of competitors can seem a bit daunting. There’s one key thing that makes your podcast unique, though: Studio-quality episodes. And the best part is that you don’t really need that much equipment to achieve that professional level.
The purpose of this guide is to help you take your podcast recording to the next level. How? By breaking down the process of audio recording, covering the proper podcast equipment, and suggesting the best editing software options. And we’ll even drop some pro tips you probably won’t find in other guides! So, let’s get started.
Before You Record Your Podcast: The Planning
Before you hit the record button for your new podcast, it’s essential to do some groundwork. A strong foundation is, after all, very important if you want a high-quality production!
In other words, the success of your podcast largely depends on the preparation you put into its creation. So, let's see some crucial aspects of podcast planning that will help ensure a smooth recording process.
#1: Define Your Purpose and Audience
Every successful podcast starts with a clear understanding of its purpose and target audience. For example, you should ask yourself: What do you want to achieve with your podcast? Who is your ideal listener?
The best way to ensure you create good content is, firstly, to define a niche, theme, or subject matter that aligns with your passions and expertise. Understanding your purpose and audience will guide your content creation, too, and help you tailor your podcast episodes to meet the needs and interests of your listeners.
#2: Develop a Content Strategy
Crafting a content strategy is also vital for keeping your podcast focused. You can do this by outlining the topics you want to cover, the format of your episodes, and the overall tone of your podcast.
Consider whether you'll have guest speakers, interviews, or solo episodes (and who will do the podcast hosting). Creating a content calendar can also help you stay organized and maintain a consistent publishing schedule, which is crucial for building and retaining a loyal audience.
#3: Plan Your Episodes
Before hitting the record button, create a detailed plan for each episode. You can outline the key points you want to cover, the structure of the episode, and any supporting materials or resources you might need.
Having a script or outline will keep your podcast organized and help you deliver your message effectively. It's okay to add spontaneity and personality, but having a roadmap ensures you don't miss important points.
#4: Invest in Quality Equipment and Software
We’ll cover this in more detail soon, but let’s just say that the success of your podcast also depends on the quality of your audio. So, invest in a good microphone, headphones, and audio recording/editing software. Clear, professional sound enhances the listener experience and reflects positively on your podcast's credibility.
#5: Create a Consistent Brand
You should aim to build a recognizable brand for your podcast through a consistent visual identity, including a logo, cover art, and social media graphics. This branding should also align with the tone and theme of your podcast, making it easily identifiable across different platforms.
Your cover art, for example, is like the billboard for your show. It should be eye-catching, reflective of your podcast's personality, and scream, "Listen to me!" Whether it's quirky illustrations, sleek designs, or bold typography, let it represent your brand loud and clear.
Before You Record Your Podcast: The Equipment
Launching a successful podcast involves more than just insightful content; the quality of your audio is equally crucial! This means that it's essential to invest in the right equipment to ensure clear, professional-sounding episodes.
So, what do you need, exactly, to record your podcast episodes? Let’s see.
Microphone
A quality microphone is definitely essential when you want to produce a great podcast. You should consider investing in a dedicated USB or XLR microphone, depending on your budget and preferences. USB microphones are user-friendly and connect directly to your computer, while XLR microphones offer higher audio quality and are suitable for more advanced setups. Popular choices include the Blue Yeti, Audio-Technica ATR2100x, and Shure SM7B.
Headphones
A good pair of headphones is also important! Why? Because they let you monitor your audio in real-time and catch any issues during recording. Closed-back headphones are usually preferable to minimize audio bleed into the microphone. Brands like Sony, Audio-Technica, and Sennheiser offer reliable options for podcasters.
Pop Filter and Windscreen
To reduce plosive sounds (like those from "p" and "b") and protect your microphone from breath noises, you should consider using a pop filter. This simple accessory can definitely improve the clarity of your recordings. On the other hand, a windscreen can be helpful to minimize wind noise and subtle environmental sounds, too.
Boom Arm or Microphone Stand
The purpose of a boom arm or microphone stand is to help you position your microphone correctly (plus, it reduces handling noise!). In other words, it allows you to maintain a consistent distance from the microphone and ensures a stable setup, preventing vibrations that could affect audio quality. Options from Rode, Blue Compass, and Heil Sound are popular among podcasters.
Before You Record Your Podcast: The Room
Having the right gear is super important, but don't forget about where you're recording—it matters, too! Your surroundings can affect how your podcast sounds and how the recording or remote recording is perceived.
To minimize external noises and distractions, select a quiet room or area for your podcast recordings. Background noises, such as traffic, appliances, or other people, can be distracting for your listeners and diminish the professionalism of your podcast. So, aim for a space where you have control over ambient sounds.
You can also invest in measures to control background noise. Use thick curtains, carpets, or acoustic panels to absorb sound and minimize echoes. Identify potential sources of noise, such as air conditioners or fans, and turn them off during recording. Consider recording during times when ambient noise is naturally lower.
Don't forget that hard surfaces can contribute to reflections and echoes in your recordings as well. So, try to avoid recording in rooms with bare walls and floors. And, if your recording space has hard surfaces, consider adding soft furnishings like rugs, curtains, or even pillows to help absorb sound and create a more controlled acoustic environment.
Before You Record Your Podcast: The Recording Software
As you gear up to start your podcasting journey, getting acquainted with the right podcast recording software is a game-changer. The software you choose can greatly influence the ease of your recording process and the overall quality of your podcast. So, it’s now time to see some software options for podcast recording, podcast editing, and even distribution!
StreamYard
StreamYard is a professional podcast recording studio that works directly from your browser. This means you can record podcasts with remote guests from anywhere in the world with perfect quality on any device.
Top reasons to record your podcast with StreamYard:
- Interview guests
- You can have 6-10 on-screen participants at once, depending on your plan.
- Guests can join from their Chrome browser with a link — no signups or downloads.
- Local recordings
- Separate audio files (WAV) and video files (MP4) are recorded on each user's device.
- Separate audio and video tracks for each user which you can edit in post.
- The recordings will look clear, even if someone has a weak internet connection.
- Repurpose your podcast
- Our trimmer tool makes it easy to make and post podcast clips to social media platforms, including YouTube Shorts, TikTok, Instagram Reels, and Facebook Reels.
- Smaller podcasters can go viral and find new listeners by posting clips to platforms with robust discovery mechanisms (like TikTok).
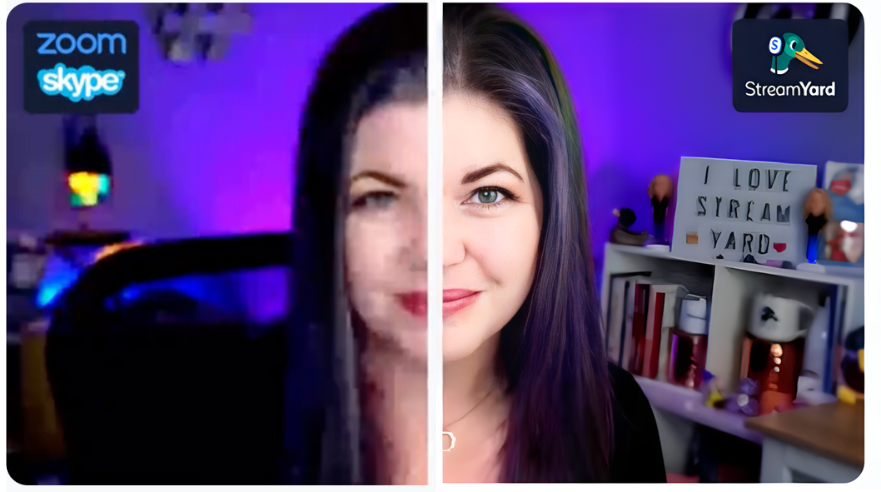
Zoom
Zoom has become a household name for virtual meetings, but it also serves as a versatile tool for podcast recording - especially if you're planning remote interviews or co-hosted sessions.
The advantages of Zoom are its user-friendly interface and the ability to record separate audio tracks for each participant. Now, you will need to keep in mind that while Zoom is convenient, you won’t have any sort of local backup recording. So, if your internet connection goes down, you might lose your content.
Skype
Skype has been connecting people across the globe for years, too, and it's not just for video calls. Many podcasters swear by Skype for its reliable audio quality and ease of use. If your podcast involves remote guests or co-hosts, Skype can work, too. Just be sure to complement it with a local backup recording to dodge any potential tech hiccups.
Audacity
Audacity is a free, open-source audio editing software. It’s used by many beginners and seasoned podcasters and has an intuitive interface. So, it’s a good option for both recording and editing podcast episodes.
Audacity also supports multiple tracks, which means you can layer in music, sound effects, or additional audio elements. It's available for Windows, macOS, and Linux.
GarageBand
If you're using a Mac, GarageBand is a great option because... well, it's right there, pre-installed on most Mac computers and ready to roll. It's got all the basic features for recording and editing audio, and lots of podcasters prefer it because it works perfectly with their Apple gear. Plus, GarageBand keeps it simple, so whether you're just starting out or you're a pro, it can do the job.
Recording Your Podcast: Preparing Your Setup
As you gear up to hit that record button in StreamYard and share your voice with the world, getting your podcast setup in top-notch shape is crucial. So, before you read your script, let’s see how to prepare your setup!
- Check Your Equipment: Before you start recording, give your equipment a once-over. Ensure your microphone is in working order, your headphones are ready to roll, and all cables are properly connected. Don't forget to check your recording device or computer for available storage space – the last thing you want is to be cut off mid-sentence.
- Microphone Setup: Position your microphone correctly to capture clear and crisp audio. Consider investing in a pop filter to minimize plosive sounds and a windscreen to reduce background noise. If you're using a boom arm or microphone stand, adjust it to a comfortable height to maintain a consistent distance from your mouth.
- Headphones On: Wearing headphones during your recording is a must. Not only do they help you monitor your audio in real-time, catching any potential issues, but they also create a more immersive experience. Choose closed-back headphones to minimize sound leakage into the microphone.
- Test, Test, Test: Do a quick test recording to ensure everything is working as it should. Check for any unexpected background noise, audio glitches, or technical issues. This pre-recording check can save you from headaches during your actual recording session.
- Recording Environment: Take a look at your recording space. Ensure it's quiet and free from potential interruptions. Consider adding acoustic treatments, like blankets or pillows, to minimize echoes. If possible, record in a room with soft furnishings to absorb sound and create a controlled environment.
- Lighting Matters: If you're recording video along with your audio, pay attention to lighting. Natural light is fantastic, but if that's not an option, invest in soft, diffused lighting to avoid harsh shadows. A well-lit recording space enhances the visual quality of your content.
- Check Your Internet Connection: If you're recording remotely or live streaming, a stable internet connection is crucial. Check your internet speed to ensure a smooth recording or streaming experience. Consider using a wired connection for added reliability.
- Backup Plan: Always have a backup plan in place. Whether it's a secondary recording device, a spare microphone, or an alternative recording location, being prepared for unexpected hiccups can save your podcast episode.
After Recording Your Podcast: Editing and Post-Production
If everything has worked as expected... Congratulations! You have captured your podcast episode! Now, as you step into the post-recording phase, it's time to refine your content and elevate it to the next level through thoughtful editing and post-production.
Start by organizing your raw audio files. You can create a dedicated folder for each episode, and label your files systematically. This initial step will help you set the foundation for a smooth editing process and help you locate specific segments or elements efficiently.
Before diving into detailed edits, listen to the entire recording. This allows you to familiarize yourself with the content, identify any major issues, and get a sense of the overall flow of the episode. Note areas that require special attention, such as awkward pauses, background noises, or sections that may need clarification.
Consider if you want to trim out long pauses and filler words ("um", "uh"). You don’t have to if you want to make it feel raw and authentic — but keep the pacing dynamic, ensuring that your listeners stay engaged throughout the episode. Use this opportunity to tighten up the content and maintain a smooth narrative flow.
Fix audio quality issues during the editing process. You can use noise reduction tools to minimize background noise, adjust volume levels to maintain consistency and equalize the audio to ensure a balanced and pleasant listening experience. Pay special attention to any noticeable clicks, pops, or distortions, and apply corrections as needed!
Adding Music and Sound Effects
A great way to enhance your podcast is to incorporate music or sound effects where appropriate. For example, you can introduce your podcast with a catchy theme or transition between segments with subtle background music. Be mindful not to overpower your voice, ensuring that the music complements the content rather than distracting from it.
You don't want your voice getting lost in a musical mosh pit. The key is to let the music groove in the background, complementing what you're saying without stealing the spotlight. Think of it like your voice is the lead singer, and the music is the backup band – they work together to make a killer track.
So, when you're choosing your music or sound effects, pick tracks that fit the mood of your podcast. Just keep it in harmony with your content, and you'll have a podcast that not only sounds great but also feels like a nice audio adventure for your listeners.
Including Intro and Outro Elements
If you like listening to podcasts, you probably know that the best ones have intro and outro elements. So, you should also consider crafting a compelling introduction and outro for each episode. Remember: This is your chance to set the tone, welcome your audience, and provide a sneak peek into the content. A well-crafted outro wraps up the episode smoothly, leaving a lasting impression on your listeners.
If your podcast features different segments or topics, you can also consider adding markers or timestamps to make navigation easier for your audience. This segmentation will enhance the listener experience and allow them to revisit specific sections if desired.
Our Best Podcast Tips
We’ve covered planning, equipment, and editing software. Before we come to a close, let’s quickly review some handy tips that can truly make a difference.
Tip #1: Embrace Your Passion
Your podcast is a reflection of your interests and expertise, so we thought it would be good to also talk a little about why creating your podcast should be something you enjoy.
The goal, generally speaking, is to embrace your passion and let it shine through in your episodes. Whether you're discussing niche topics, sharing personal stories, or diving into your favorite subjects, your enthusiasm will naturally resonate with your audience.
Tip #2: Celebrate Milestones
Take the time to acknowledge and celebrate your podcasting milestones. Whether it's reaching a certain number of episodes, gaining a specific number of listeners, or receiving positive feedback, these milestones mark your progress and dedication.
It's all about building a community. When you let your listeners in on the good news, you're not just celebrating alone; you're creating a shared success story. Your milestones become their milestones, and suddenly, you've got others cheering you on. So, share these achievements with your audience to create a sense of community and shared success.
Tip #3: Connect with Your Audience
It’s also important to engage with your listeners and build a community around your podcast. Encourage feedback, respond to comments, and consider incorporating listener questions or shoutouts in your episodes. Fostering a sense of connection with your audience transforms podcasting from a one-way communication channel to a dynamic conversation.
Tip #4: Experiment with Content
Don't be afraid to experiment with your podcast content. You can try different formats, invite guest speakers, or explore new topics. You can try out different things – maybe one day you're doing a solo riff, and the next you're having a chat with a cool guest. Variety is the spice of life, and it's also the secret sauce for keeping your podcast fresh and exciting.
Keeping your content fresh and dynamic not only keeps you engaged as a podcaster but also adds variety for your audience, making each episode a unique and exciting experience.
Tip #5: Stay Flexible and Adapt
Podcasting is a journey of growth and learning. Things change, trends shift, and your audience evolves. So, stay flexible and be open to adapting your approach based on feedback and evolving trends.
The podcasting landscape is like a wild, untamed jungle. Sometimes, you have to swing from vines, climb trees, and maybe wrestle with the occasional podcasting lion. But hey, that's where the magic happens. Stay flexible, roll with the punches, and let the journey of podcasting unfold. Embrace the opportunity to refine your style, improve your skills, and adapt to the changing landscape of podcasting.
Conclusion
So, what have we learned in this guide?
First, we covered the importance of good planning. Before you dive into recording your podcast, you should always invest time in defining your purpose, understanding your audience, developing a content strategy, and planning your episodes. Investing in quality podcasting equipment is also a crucial step before you start recording. We’re talking, for example, about a good microphone, headphones, pop filter, windscreen, and boom arms.
Preparing your podcast setup is also important. Choose a quiet and comfortable space, position your microphone thoughtfully, check your internet connection and close unnecessary apps.
Recording your podcast is not just about delivering content. So, when it’s time to choose your podcast recording tool, pick a solution that can help you enjoy the journey, too!
StreamYard is easy to use, it seamlessly integrates with all your social media, and you can have podcast guests without them even having to register.
You can get started for free!