

Written by StreamYard
How To Draw On Screen In StreamYard
If you create live streams, you may want to enhance your live viewers’ experience. Drawing on screen can be one way to do that. By learning how to draw on screen in StreamYard, you can keep your viewers tuned in during your live broadcasts.
Read on to check how to scribble on your live video and make it more engaging.
What Is Drawing On Screen?
Drawing on screen is similar to drawing on a sheet of paper. Using this feature, you can draw lines, squares, circles, rectangles, and any other shape. You can even write on the screen. The concept is simple: enabling you to emphasize the key points you want to highlight in a live video and explain things better.
From creating explainer videos or better product demonstrations and even upgrading your presentations with real-time discussions, you can do it all by scribbling on the screen.
Here’s how you can use this feature in StreamYard.
How To Draw On Screen In StreamYard
1. Use A Whiteboard Tool
The simplest way to draw on screen in StreamYard is to use a whiteboard tool. Let’s see how it works:
Step 1: Launch A Whiteboard Tool
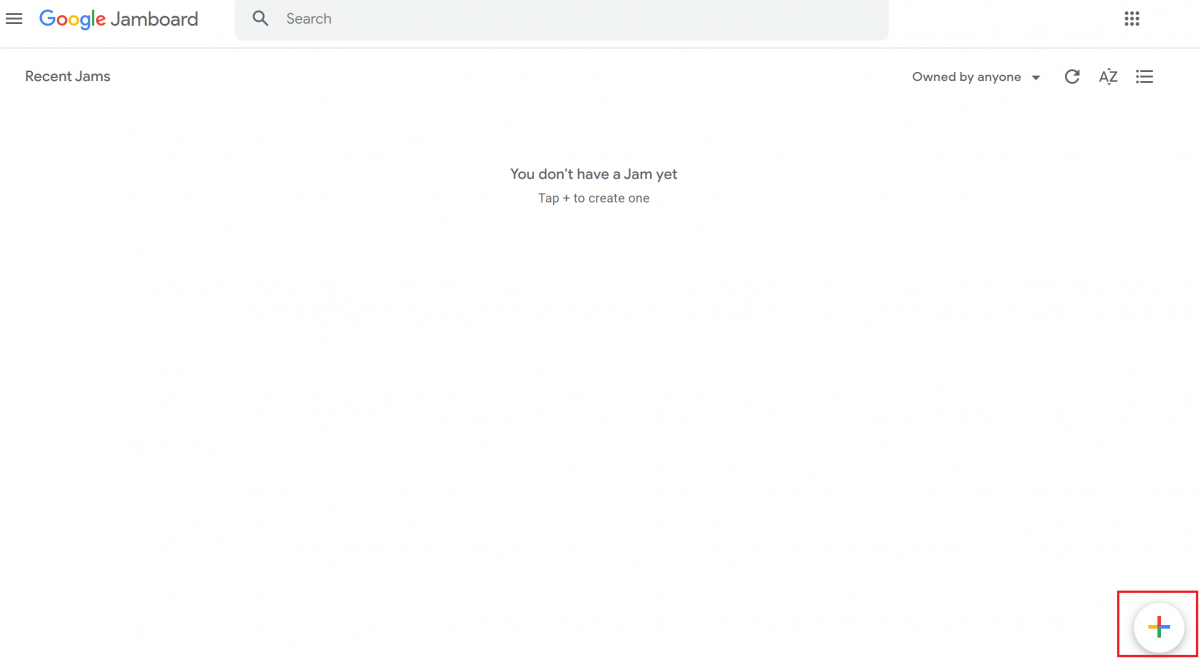
Choose a whiteboard tool to draw on the screen in your live video. In this tutorial, we’ll share how to scribble in your live stream using Google Jamboard.
Launch the whiteboard from Google and click the “+” icon at the bottom right to create a Jam.
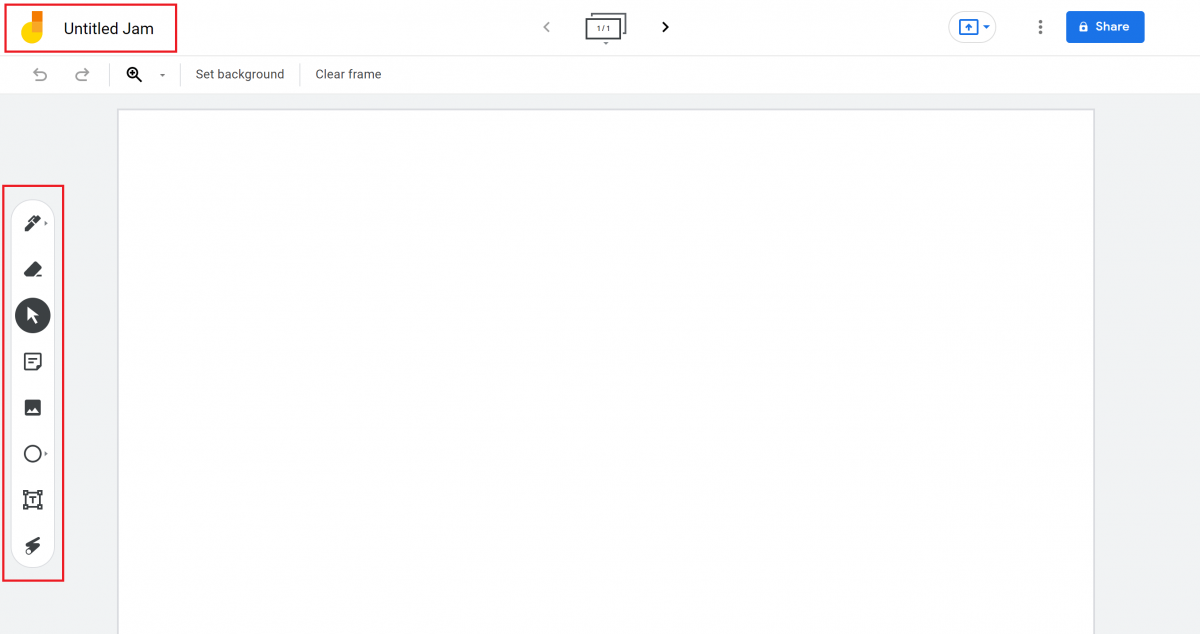
You can give it a name by clicking “Untitled Jam” in the top-left. Once you have given your Jam a name, explore its features to draw on the whiteboard.
Step 2: Log Into StreamYard And Create A Broadcast
Go to your StreamYard dashboard and create a broadcast. Give your broadcast a title, description and choose its privacy.

Step 3: Share Screen In StreamYard
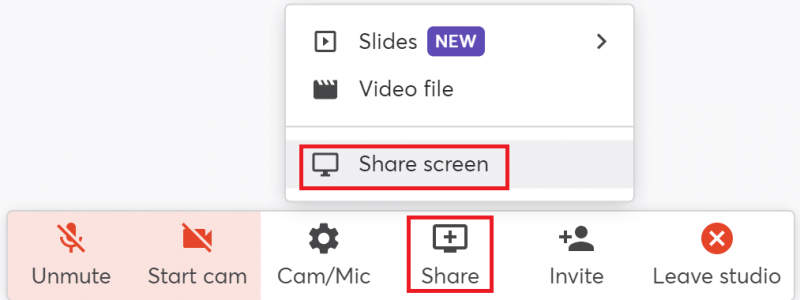
Inside the StreamYard studio, click “Share” and choose “Share screen” from the options.
Now, click on “Window”, select the Google Jam you created in step 1 and click “Share”.
Step 4: Draw On Screen
That’s it. You can now draw on the screen in your Google Jam and share it in StreamYard with your audience.
Once done, click “Stop sharing”.

2. Use iPad And ATEM Mini Pro
Another great way to draw on screen in StreamYard is using an iPad and ATEM Mini Pro.
Step 1: Connect Your iPad And ATEM Mini Pro To The Computer
Plug your iPad or tablet into your ATEM Mini Pro. Connect your ATEM Mini Pro to your computer using the appropriate cables.
If you are using a DSLR camera, connect it to the ATEM as well.
Step 2: Launch A Drawing/Writing App On The iPad
There are plenty of apps for drawing or writing on an iPad. Examples include Keynote, PowerPoint, and GoodNotes. Choose and launch one of these apps to draw on screen in StreamYard.
Step 3: Set Your Camera Source
In StreamYard, ensure that you have your camera source set to the ATEM Mini Pro. You can switch between your camera and your connected tablet via the ATEM Mini.
Step 4: Go To StreamYard And Create A Broadcast
Go to your StreamYard dashboard and create a broadcast. Give your broadcast a title, description and choose its privacy.
Step 5: Draw On The Screen
With the ATEM Mini Pro set as your camera source, you can now draw on your iPad using an Apple Pencil or a stylus and share the screen using the ATEM Mini Pro switcher.
3. Install A Google Chrome Extension
If you're looking for a lightweight way to draw on screen in StreamYard, you can also use Draw on Page.
Step 1: Open Google Chrome
First, you'll want to open Google Chrome.
Step 2: Install Draw on Page
Visit the Draw on Page Chrome extension listed above.
Install Draw on Page.
Step 3: Set Up Your Windows
When you are drawing on screen, it's typically best to have one tab open with what you want to share and write on. Keep a second tab or window open with your StreamYard studio.
Step 4: Go To StreamYard And Create A Broadcast
Go to your StreamYard dashboard and create a broadcast. Give your broadcast a title, and description.
Step 5: Share Screen In StreamYard
Inside the StreamYard studio, click “Share” and choose “Share screen” from the options.

Now, click on “Window” or "Tab" and select what you want to use with Draw on Page and click “Share”.
Step 6: Draw On Screen
Be sure you have enabled the Draw on Page Chrome extension. You can now start to draw on the screen that you shared. Your changes, shapes, lines, and more will now show up in your broadcast.
Once you are finished, click “Stop sharing”.
FAQs On Drawing On Screen In StreamYard
What Is Latency?
When you experience a delay between drawing on your screen and having it show up, that is latency. It is measured in ms (millisecond, or 1/1,000 of a second).
Why Do I Experience Latency While Drawing On The Screen?
Latency is expected when you share something on a screen. It’s the time between giving an instruction to a computer and the actual result to show. So, latency will occur when you draw on a computer, causing a tad bit of lag in showing the actual drawing on the screen. You may experience latency issues when you have some of these factors: slow internet, distance from the router, a lack of system resources, and so on.
Can I Save The Results Of My On-Screen Annotation?
Yes, most software that allows annotation offers the functionality to save the results. You can even print the results if you want.
Apart From Drawing On The Screen, What Else Can I Do Using StreamYard’s Screen Sharing Feature?
You can present a slideshow or show a video. You can also share images, videos, PDFs, and more using StreamYard’s screen sharing feature.
How Are You Using On-Screen Drawing In StreamYard?
Present your slides better or make teaching effortless with on-screen annotation. While the above tutorial wraps up the process of drawing on screen using StreamYard, there are still plenty more features you can use to experience the ease that StreamYard offers.
Dive deeper into StreamYard Teams and work with others without sharing your login credentials. And if you are looking for ways to connect better with your viewers, check out this article on building an audience.