

Written by StreamYard
How to Use Blackmagic ATEM Mini Pro with StreamYard
Professional live streamers use a variety of streaming tools. One valuable device to have in your arsenal is the Blackmagic ATEM Mini Pro.
Deemed as one of the best live production tools, the ATEM Mini can enhance your live stream broadcasts. Unlike most video switchers, the ATEM Mini switchers offer excellent quality images, a host of picture-in-picture and video effects, along with some of the best broadcast features – to ultimately benefit your live videos.
In this post, we'll explore how to use the Blackmagic ATEM Mini Pro with StreamYard to increase the production value when creating videos.
What is the Blackmagic ATEM Mini Pro?
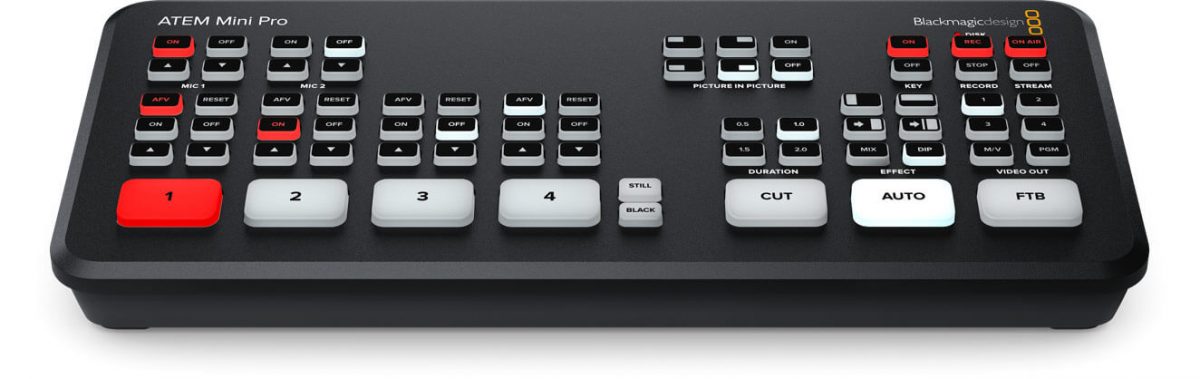
The Blackmagic ATEM Mini is a low cost, multi camera, live production tool. Think of it as your gateway to professional multi camera live productions. With its headline feature being the ability to switch live up to 4 high quality video camera inputs (8 if you're using the ATEM Mini Extreme), it's inarguably the switcher you need to level up your live streams.
Users love how Blackmagic's ATEM Mini range includes a variety of models to suit different requirements. From the ATEM Mini to the ATEM Mini Pro and the ATEM Mini Extreme, all are equally superb yet smartly different in terms of features and functionalities.
The good part, though? To use a Blackmagic ATEM Mini with StreamYard, any of the models will work. And you can also use any of the models to pre-record your videos using StreamYard.
One other additional benefit is that you can use your DSLR cameras with it, without the need to purchase a separate capture card. It just works.
With that said, if you are looking for additional camera switchers, be sure to check out this list of the best video switchers for live streaming.
What do you need to use the ATEM Mini Pro with StreamYard
If you're serious about using the ATEM Mini Pro for your live streams, here is what you'll need if you're using StreamYard:
- ATEM Mini (any model)
- HDMI cable
- StreamYard
- HDMI-capable camera
- A computer with a USB port
The ATEM is a powerful way to use multiple cameras when live streaming, albeit not simultaneously. So, if you want to add multiple cameras to your live stream in StreamYard, here's a video you must check out:
How to use a Blackmagic ATEM Mini Pro with StreamYard
Add a lot more power to your live streams by using the Blackmagic ATEM Mini Pro with StreamYard. Here's how to do that:
Step 1: Connect your ATEM Mini Pro
To use your ATEM Mini Pro with StreamYard, connect it to your computer using the USB out on the back.
When you do this, your ATEM Mini Pro gets recognized as webcam and becomes a camera source within StreamYard or other video applications.

Pro Tip: If you want to see what your output will look like, you can connect an external monitor to the HDMI out on the back of the ATEM Mini.
Step 2: Connect your camera sources
In order to use the ATEM Mini Pro with StreamYard, you'll need to plugin HDMI-capable cameras, such as a DSLR. You can also display the screen from your mobile device, such as an iPhone or iPad, by using a USB-C to HDMI cable or a lightning adapter with an HDMI cable.
Connect these devices to the HDMI ports on the back of your ATEM Mini Pro.
You can switch between each camera using the large 1 / 2 / 3 / 4 buttons on the front of the ATEM device. This will also change the camera within StreamYard.
When connecting multiple cameras to the ATEM Mini Pro, consider having a main camera, as well as an overhead or another view from behind if you're showcasing products, your studio, and so on.
Step 3: Connect your audio source
I run my audio through a dedicated mixer, so my video and my audio feed are different.
Some will use the ATEM Mini Pro with StreamYard and have their audio and video running through their ATEM using Mic 1 or Mic 2 on the back of the device.
You can connect these using the 3.5mm mic 1 and mic 2 cables.
Remember to turn these on from the front as well if you're running both audio and video through the ATEM Mini Pro.
Step 4: Set up StreamYard
Log in to your StreamYard account and create a broadcast. If it's your first broadcast, don't miss out on this video:
Step 5: Switch the camera and audio sources
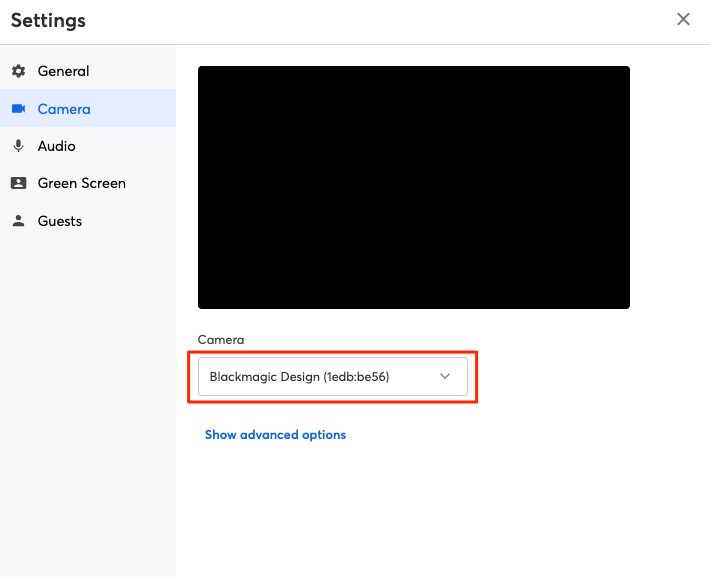
To set your camera inside your StreamYard broadcast studio, click on "Cam/Mic" and then under "Camera", choose your Blackmagic ATEM Mini Pro from the dropdown menu.
At this point, you should see yourself on the screen if you have your camera powered on and the lens cover off.
To set your audio source, click on "Audio" and choose the ATEM Mini Pro with StreamYard.
Step 6: Go live
After you've successfully set up your ATEM Mini Pro with StreamYard, customize your broadcast with banners, branding and invite guests to join you on your live streams.
Whenever you're ready to stream, hit the "Go live" button on the top-right and deliver a great live experience to your audience.
Blackmagic ATEM Mini Pro with StreamYard | FAQs
How do I connect an ATEM Mini to my computer?
The ATEM features a USB-C output. You connect it directly to your computer. It would then be seen as a camera source within StreamYard.
Can I see what will be displayed in StreamYard from the ATEM Mini Pro?
Yes. The ATEM Mini features direct video output. You can use it to preview your StreamYard broadcast, as well as the program output (what viewers see). You can control this on the ATEM Mini Pro under the "Video Out" section on the device.
How do I stream from ATEM Mini Pro?
The ATEM Mini Pro lets you stream directly via Ethernet to YouTube and other destinations. Find out more about streaming from ATEM Mini Pro here.
Can I use a webcam with an ATEM Mini Pro?
No. The ATEM Mini only supports HDMI-capable cameras. If you have a spare webcam lying around, you can connect it to your computer. You would need to switch the camera source in StreamYard to see it.
Another way to use your smartphone as an additional webcam is using Reincubate Camo.
Do I need a capture card with the ATEM Mini Pro?
No. One of the best things about the ATEM Mini line of products is that you don't need to use a capture card. Simply plug your HDMI-capable camera into your ATEM Mini Pro, and it will do all the necessary video conversions to ensure your video feed is properly formatted.
If you are interested in connecting additional camera sources to your computer, you can always use a capture card with another camera. Here are the best capture cards to consider.
What are some others ways to use the ATEM Mini Pro to enhance your live streams?
While you can use the physical buttons on the ATEM Mini Pro to switch between different cameras, check out some of these additional ways to enhance your live streams.
Which ATEM Mini will you use?
Whether you're a content creator looking for tools to increase the production quality of your live streams or pre-recorded live videos or a professional planning to use multiple cameras without getting overwhelmed, using the ATEM Mini Pro with StreamYard is the way to go.
You can quickly and easily switch between HDMI-capable cameras during your broadcast. You can also bring up on-screen graphics, add transitions, tap into picture-in-picture and much more.
The ATEM Mini truly is a powerful tool that can help increase your production value, while also helping you grow on your live streaming journey.
How do you see the Blackmagic ATEM Mini lineup improving your live streams?