Écrit par : The StreamYard Team
How to Connect Streaming Software to Facebook (Without Breaking Your Brain)
Last updated: 2026-01-10
If you want the fastest, least‑stress way to connect streaming software to Facebook, use a browser studio like StreamYard: add Facebook under Destinations → Add a destination → Facebook, authorize once, then go live from your studio with a couple of clicks. When you specifically need deep encoder control, scene complexity, or a desktop workflow, you can connect tools like OBS or Streamlabs to Facebook by pasting Facebook’s Server URL and Stream key into their RTMP settings instead.
Summary
- The simplest way to connect streaming software to Facebook is through StreamYard’s built‑in Facebook destination flow, which handles the Facebook login and permissions for you. (StreamYard Help Center)
- Facebook’s own Live Producer also lets you connect any encoder (OBS, Streamlabs, etc.) via a Server URL + Stream key that you paste into your software. (Facebook Help Center)
- For most creators in the US, a browser‑based studio like StreamYard is faster to learn, easier for guests, and removes the need to manage encoders, drivers, or powerful streaming PCs.
- Desktop tools like OBS and Streamlabs can work well when you truly need advanced scene setups, but they add complexity that many talk‑style shows, webinars, and interview formats simply don’t need.
How does connecting streaming software to Facebook actually work?
Before we dive into specific tools, it helps to understand what’s going on under the hood.
There are two main ways to get your video into Facebook Live:
-
Direct integration from your streaming software
Some tools (like StreamYard and Streamlabs) let you “log into Facebook” from inside the app. The software calls Facebook’s API, adds a destination, and handles the technical bits for you. In StreamYard, you do this from the Destinations page by choosing Add a destination → Facebook and following the prompts. (StreamYard Help Center) -
RTMP/stream key connection
Every Facebook Live broadcast has a Server URL and a Stream key. Facebook surfaces these inside its Live Producer interface when you choose Streaming software as your video source. (Facebook Help Center) You paste those values into your encoder (OBS, Streamlabs, etc.), then hit “Start Streaming” in your software and “Go Live” in Facebook.
If you keep that mental model in mind—either log in directly from your software, or copy/paste the stream key—the rest of this guide will feel much simpler.
How do you connect Facebook to StreamYard step by step?
If your priority is getting reliable Facebook streams started quickly, especially with guests, StreamYard is usually the easiest place to begin.
Here’s the basic flow for connecting a Facebook destination in StreamYard:
-
Create or sign in to your StreamYard account
Open your browser, go to StreamYard, and sign in. -
Go to Destinations
In the main dashboard, click Destinations in the sidebar. -
Add a Facebook destination
Click Add a destination, then choose Facebook. StreamYard lets you connect a Facebook profile, Page, or group. (StreamYard Help Center) -
Authorize Facebook
You’ll be redirected to Facebook to log in (if you’re not already) and grant the necessary permissions so your streaming software can create and manage lives on your behalf. -
Pick where you’ll go live
Choose whether this destination should be your profile, a Page you manage, or a group where you have permissions. Once you confirm, that destination appears inside StreamYard for future broadcasts. -
Start a broadcast from your StreamYard studio
- Click Create and choose Live stream (or a similar option depending on your plan).
- Select your newly added Facebook destination.
- Set your title, description, privacy, and schedule if you want to go live later.
- Enter the studio, add your camera and mic, invite guests via link, customize your layout, and click Go live when you’re ready.
From here, you only need a browser and a decent internet connection. There’s no encoder to configure, and guests don’t have to install anything—people repeatedly tell us it “passes the grandparent test” because guests can join reliably with just a link.
What about Facebook’s eligibility requirements?
Facebook itself imposes a few rules on who can go live. For example, when you stream to certain types of destinations, Facebook can require that your account is at least 60 days old and that a Page or professional‑mode profile has at least 100 followers. (StreamYard Help Center)
Those requirements apply regardless of whether you use StreamYard, OBS, Streamlabs, Restream, or anything else. If you see errors connecting to Facebook, always check:
- Is your Facebook account old enough?
- Does your Page or professional‑mode profile meet the follower threshold?
- Do you have the right admin or moderator role?
Once Facebook says “yes” to those questions, connecting through StreamYard is usually a one‑time step. After that, you pick the destination like any other social channel.
How do you use Facebook’s Live Producer with OBS or Streamlabs?
If you’re using a desktop encoder like OBS or Streamlabs, you’ll usually connect to Facebook via RTMP using the Live Producer interface.
Step 1: Get your Facebook Server URL and Stream key
- On Facebook, go to the Page, profile, or group where you want to go live.
- Click to create a new live video (Facebook may call this Live video or similar).
- When Facebook opens Live Producer, look for the Select a video source section.
- Choose Streaming software as your video source. (Facebook Help Center)
- Facebook will display:
- A Server URL (typically an RTMPS URL)
- A Stream key (long string of characters)
- Optionally, enable Persistent stream key if you want to reuse the same key in future streams so you don’t have to copy a new one every time. (Facebook Help Center)
Keep this browser tab open—you’ll come back to it once your software is ready.
Step 2: Configure OBS Studio with Facebook RTMP
In OBS Studio, you’ll plug in that Server URL and Stream key:
- Open OBS Studio.
- Go to Settings → Stream.
- For Service, you can select Facebook Live if it’s listed, or choose Custom if you want to paste the Server URL manually.
- Paste the Server URL from Facebook into the appropriate field.
- Paste your Stream key into the Stream Key field.
- Click Apply, then OK.
- Build your scene (camera, microphone, screen capture, overlays, etc.).
- When you’re ready, click Start Streaming in OBS.
- Switch back to the Facebook Live Producer tab—you should see a preview of your stream. Add your title and description, and click Go Live.
This approach gives you more granular control over scenes and encoding, but it comes with more moving parts: you’re managing your own CPU/GPU load, audio routing, and encoder settings.
Step 3: Configure Streamlabs Desktop with Facebook
Streamlabs uses a similar RTMP pattern, but it also offers a direct account connection.
To connect via the built‑in workflow:
- Open Streamlabs Desktop.
- Go to Settings → Stream.
- Click Connect and choose Facebook.
- Log into Facebook in the popup and grant Streamlabs the requested permissions.
Streamlabs’ own docs describe this flow as navigating to Settings → Stream and clicking Connect to link your Facebook account. (Streamlabs Support)
From there, you can select Facebook as your target and go live directly from Streamlabs. Under the hood, it’s still using a stream key, but you don’t have to handle it manually.
If you prefer, you can also paste a Server URL and Stream key from Facebook Live Producer into Streamlabs’ streaming settings, similar to OBS.
When does this desktop approach make sense?
Desktop encoders are powerful when you:
- Need highly complex scene setups and custom transitions.
- Want to integrate capture cards, multiple monitors, and extensive visual filters.
- Already have a strong PC and don’t mind tuning bitrates, resolutions, and buffer sizes.
For many US creators focused on talk‑shows, interviews, or webinars, those extras don’t move the needle as much as ease of use, reliable guests, and fast setup—which is why a lot of people end up starting in OBS or Streamlabs and then switching to a simpler browser studio once the complexity becomes a burden.
How do you add Facebook in StreamYard and schedule events?
Once your Facebook destination is connected in StreamYard, using it day‑to‑day becomes a simple part of your show workflow.
Adding Facebook as a destination (quick recap)
- Open Destinations in StreamYard.
- Click Add a destination → Facebook.
- Log into Facebook and pick the profile, Page, or group you want. (StreamYard Help Center)
You usually only need to do this once per destination.
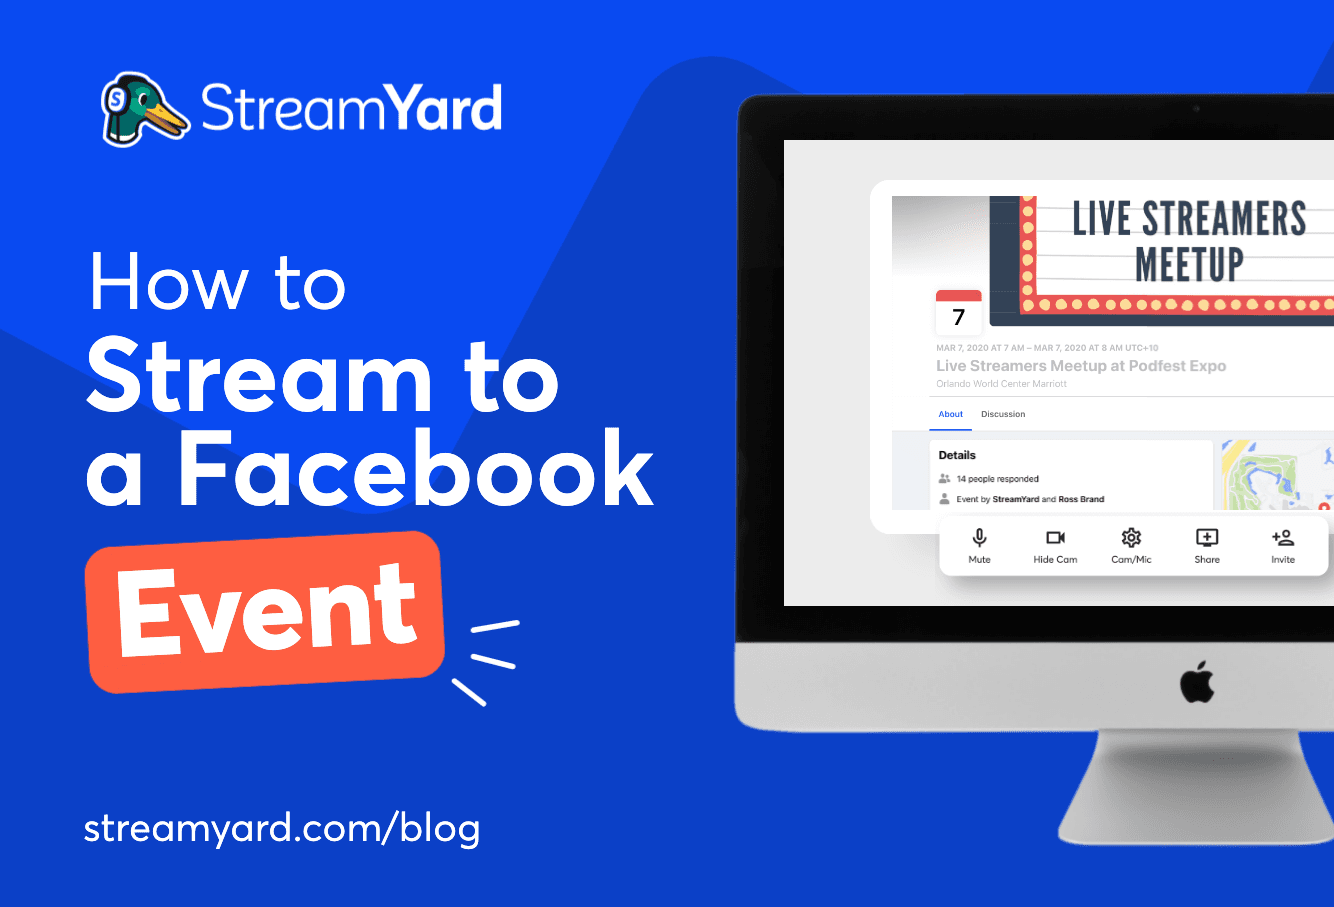
Scheduling a Facebook live or event from StreamYard
You can set up a scheduled broadcast that publishes on Facebook ahead of time, so your audience gets notified.
- In your StreamYard dashboard, click Create and choose Live stream or a scheduled option.
- Select your Facebook destination (and optionally YouTube, LinkedIn, etc., if you’re multistreaming on a paid plan).
- Set your title, description, date, and time.
- Upload a thumbnail if you want that polished event look.
- Save the event—Facebook creates a scheduled live post or event your followers can see.
When it’s time to go live, you enter the StreamYard studio for that event, check your camera/mic, bring in guests, and go live with a single button. Because everything runs in the browser, multiple remote producers can join the same studio and help manage comments, overlays, and scene layouts without needing local software installs.
For many creators, this “studio‑first” approach is the main difference compared with desktop encoders: instead of thinking in terms of scenes and encoders, you’re thinking in terms of shows, episodes, and guests—which is usually a better mental model for social live video.
How does multistreaming to Facebook work in StreamYard vs Restream?
A common follow‑up question is: “Can I go live on Facebook and YouTube or LinkedIn at the same time?” That’s where multistreaming comes in.
StreamYard multistreaming basics
On paid plans, StreamYard lets you send one show to multiple destinations at once—like a Facebook Page, a YouTube channel, and a LinkedIn page.
- The Core plan supports multistreaming to 3 destinations simultaneously. (StreamYard Pricing)
- The Advanced plan supports multistreaming to 8 destinations simultaneously, including custom RTMP endpoints and guest destinations. (StreamYard Pricing)
The key mindset: you create one show in the StreamYard studio, then toggle on whichever platforms you want to include. You don’t have to worry about bandwidth for 3–8 separate outputs; StreamYard handles the distribution in the cloud.
Restream’s multistreaming model
Restream is another browser‑based option that focuses heavily on distributing a single stream to many platforms.
- Restream’s self‑serve plans are structured around how many simultaneous channels you can stream to at once: 2 for Free, 3/5/8 for paid plans, with Enterprise offering custom limits. (Restream Pricing)
- You can use Restream’s own browser studio, or feed it an RTMP signal from an encoder like OBS or Streamlabs.
Restream is useful if you want to connect to a wide range of niche platforms beyond the big four (Facebook, YouTube, LinkedIn, Twitch). Many US creators, though, find that streaming to a small handful of major destinations covers the vast majority of their audience.
Which approach makes more sense for typical Facebook creators?
Most people reading this aren’t trying to hit 20 different destinations at once. You’re trying to:
- Reach your main audience on Facebook, plus maybe YouTube or LinkedIn.
- Keep your setup simple enough that every extra show doesn’t feel like a tech project.
In that context:
- StreamYard gives you a browser studio, multistreaming to 3–8 destinations, and easy guest links in one place.
- Restream gives you similar browser‑based multistreaming, with a bit more emphasis on channel variety and RTMP relaying from encoders.
For a typical US small business, creator, or church that mostly cares about Facebook plus one or two other platforms, StreamYard’s integrated approach tends to be more than enough—without needing to stack multiple products together.
What is Facebook’s persistent stream key and how should you use it?
If you work with encoders like OBS or Streamlabs, you’ll see an option in Facebook Live Producer called Persistent stream key.
What is a persistent stream key?
By default, Facebook can generate a new stream key for each event. That’s more secure, but it means you have to copy/paste a fresh key into your software before every show.
A persistent stream key lets you reuse the same key for multiple broadcasts. When you enable this in Live Producer, Facebook keeps the stream key stable so you can save it inside OBS or Streamlabs and not touch it again. (Facebook Help Center)
When should you enable a persistent stream key?
Use it when:
- You’re the only person streaming from that encoder to that Facebook destination.
- You want a predictable workflow without extra copy/paste steps.
Be cautious if:
- Multiple people might get access to your OBS/Streamlabs computer or configuration.
- You rotate producers or studios; you don’t want a saved stream key to be misused unintentionally.
If you’re using StreamYard, persistent keys are largely abstracted away. You connect your Facebook destination once, and our studio handles the underlying keys and RTMP sessions for you.
Why do so many creators default to StreamYard for Facebook, even if they know OBS or Streamlabs?
Let’s zoom out and look at real‑world behavior.
People often start with heavyweight desktop tools because they’re free or highly customizable. But as soon as they begin running recurring Facebook Lives—interviews, Q&A shows, webinars—they bump into a different set of priorities:
- “Can my guest join without tech drama?”
- “Can I teach my co‑host how to run this in an afternoon?”
- “Can I trust this setup when 300 people show up live?”
That’s where browser studios, and StreamYard in particular, tend to become the default:
- The interface is intentionally simple and clean, which makes it easy to learn and teach.
- Guests join with a link, no installs—people regularly tell us it’s easy enough to explain over the phone.
- You stay focused on conversation and content instead of encoder settings and drivers.
Desktop tools like OBS and Streamlabs are still useful when you truly need fine‑grained control over layouts or game capture. But for most US creators who just want to connect streaming software to Facebook, add a few guests, and look professional, a browser‑based studio is usually the more efficient path.
What we recommend
- Default path: If you want the fastest, most reliable way to connect streaming software to Facebook, start with StreamYard. Add Facebook under Destinations → Add a destination → Facebook, authorize once, and manage everything from your browser studio.
- When to add a desktop encoder: Choose OBS or Streamlabs when you need deep scene customization or complex game capture, and pair them with Facebook Live Producer’s Server URL + Stream key.
- When to add a multistream relay: If you need to reach more destinations than StreamYard’s 3–8 multistream slots or want niche platforms, consider layering in a service like Restream in front of your encoder.
- Long‑term mindset: Prioritize ease of use, reliable guests, and production consistency over maximum technical complexity—those are the factors that usually determine whether your Facebook show actually keeps going week after week.