

Written by StreamYard
Combine StreamYard with Adobe to Create Amazing Content
This article will show you how to use StreamYard and Adobe products together to create amazing content. Specifically, we will see, from start to finish, how to do a virtual podcast, creating thumbnails using Adobe Express, recording episodes on StreamYard, and editing it using AI.
Before We Start: Planning Your Video Setup
The first thing you should do when preparing your video production is start with your audio and lighting to get a great crispy shot. A good setup will motivate people to stay, so quality is a conversation starter.
Although there are many options available, what matters here is to get the right gear, and not necessarily the best one. For example, you don’t need a really expensive microphone. Instead, you can choose a reliable USB one that also has XLR capability, which prevents accidental disconnections during a live performance.
In terms of lighting, a good light makes any camera look better than what it actually is. One of the key considerations, in this case, is a large softbox with, for example, a grid hexagon.
Lastly, let’s not forget the camera setup. If you want the attention to be focused on your face, then a blurry background is a good idea. This means you will need a pair of lenses that can achieve this effect. Motivated lighting or an extra source (like an LED towards one side of the face) can also help frame the scene better - especially if it hits both you and your microphone. How you position your camera is also important. One way to get a good result is to prioritize the placement over the comfort of where your monitor is. For example, keep the camera at eye level even if you have to put the monitor somewhere lower.
Now that that our setup is ready, let's get to creating.
If you'd rather see a video walkthrough of the rest of the article, here it is. Otherwise, keep reading!
Step 1: Creating Clean Thumbnails
Success leaves clues. So, for the purpose of this article, we will see how Omar created a thumbnail that has gotten over 1,000,000 views.
The first rule when it comes to thumbnails is to keep it simple. A good way to look at this is via the rule of three: You don’t want more than three elements in your thumbnail. For example, you could have had:
-
A background / Your face
-
The text
-
Some icons
You don't want the thumbnail to be too busy because it can lead to confusion. Even if you have the greatest video on YouTube, nobody will see if they don’t find the thumbnail interesting.
Making a Thumbnail in Adobe Express
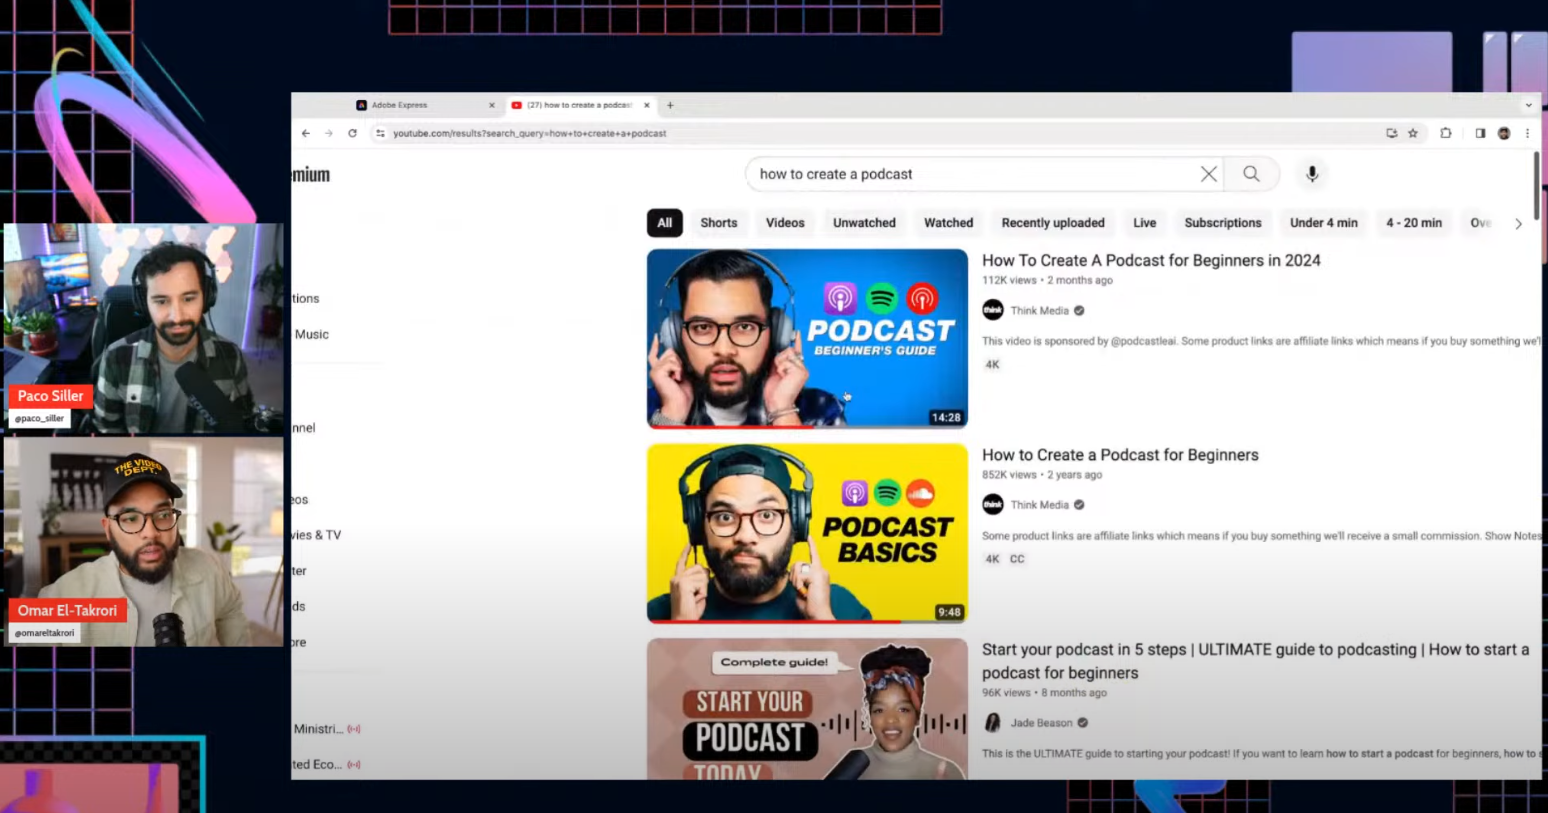
Creating thumbnails in Adobe Express is super easy because you can actually use the search bar in Adobe Express to find things to help you. For example, these are the results for the search “Youtube thumbnail”:

Image alt: Using Adobe Express to create video thumbnails.
Most of these will be quite busy, so make sure you go with what works, as opposed to what you like creatively. In the example above, the one that stands out the most is the “How to use a semicolon” one.

Starting with this template, the first thing we will do is delete the graphic and add our own. For example, we can paste an image and choose Remove Background to… well, remove the background!
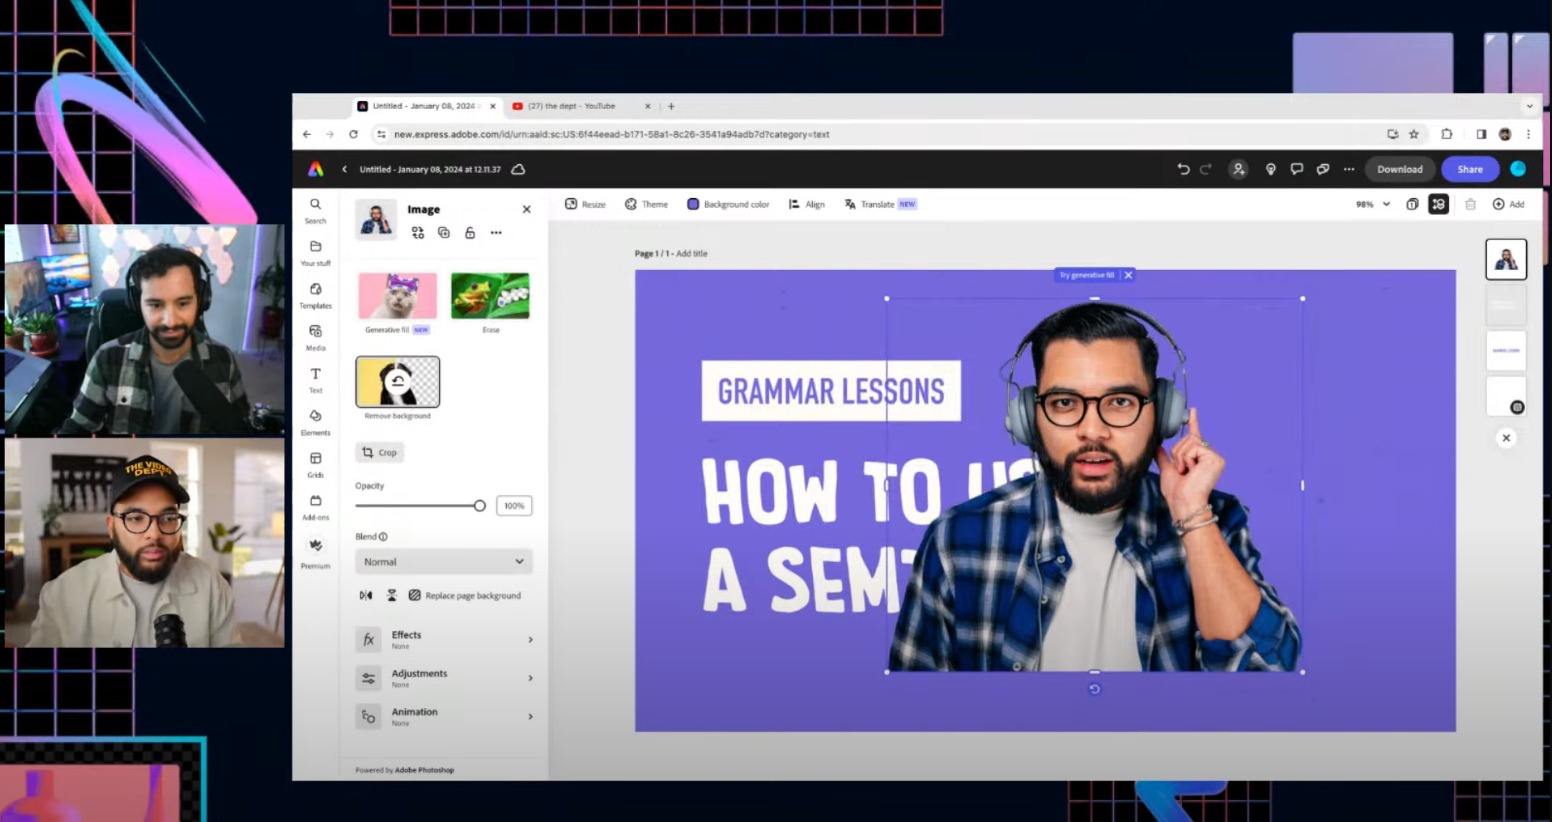
Now, if you are using a photo, you don’t want yourself to look small. Humans look at eyes, so we want to create that connection. Meaning, don’t be scared to blow it up to 70% or 80%.
For this example, we will change the background to blue by going to Background Color in the top bar, then to Custom Color and find the perfect shade. One thing Omar likes to do is also add a vignette effect (you can find it in Design Assets > Vignette), which makes things pop by creating more focus.
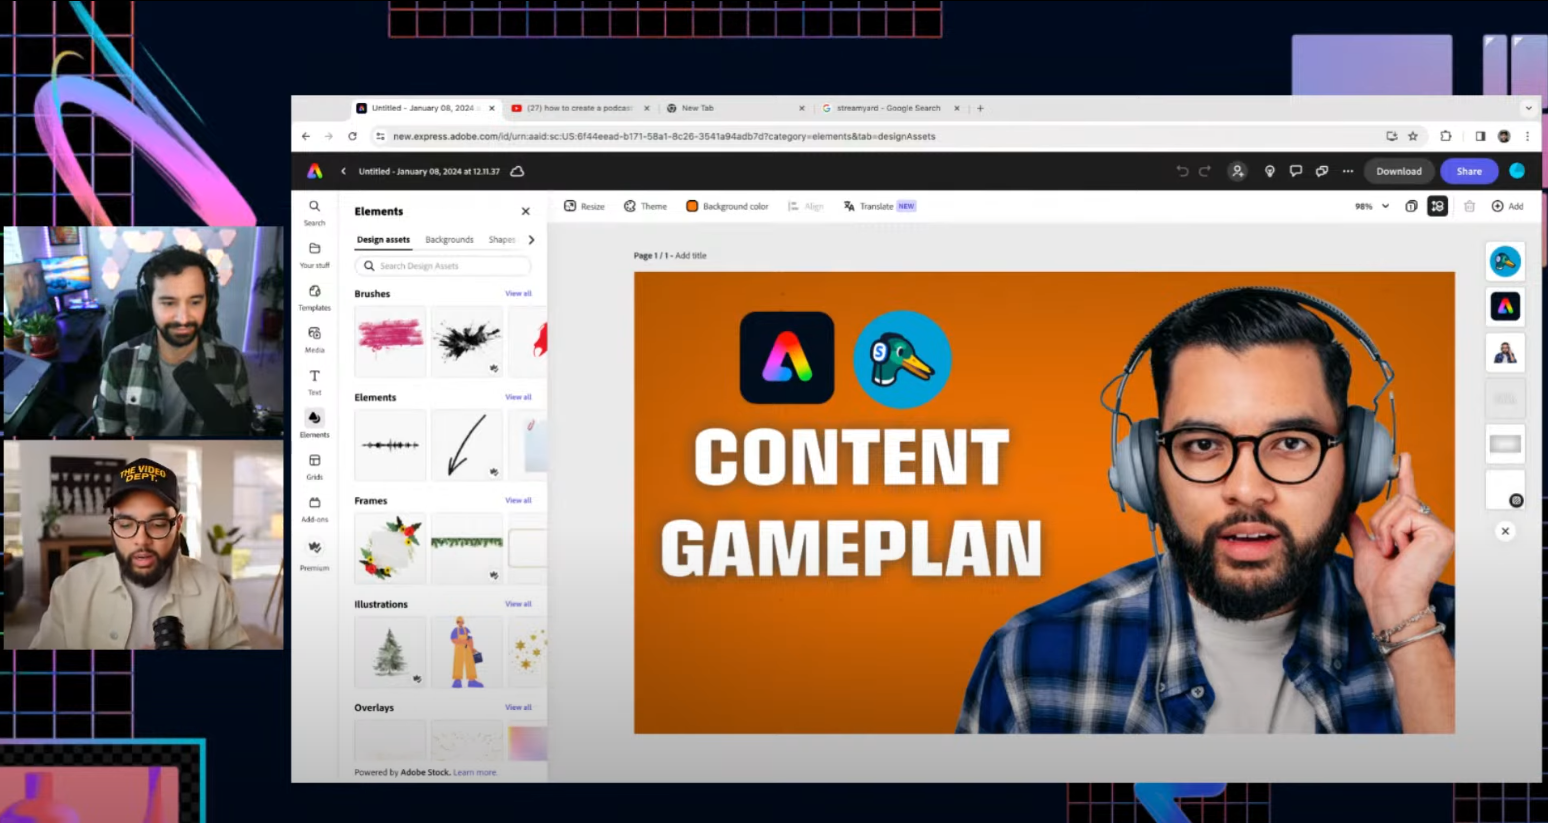
Adobe Express can also suggest fonts for your main text (they will appear in the Text section). The goal here is legibility and effectiveness. If you find a font you like and works, stick to it. Another good idea is to use other logos and brands to connect to your audience. Because they might not know you, but they will know these brands!
So, here is the thumbnail result with the three elements we mentioned before:
Adobe Express also provides a user-friendly platform for creating and scheduling social media content, so you can use it for icons, graphics, and images.
By the way, if you want to use it to create StreamYard backgrounds for free, here's a 2-minute video tutorial on that.
Step 2: Recording With StreamYard
Now that we’ve prepared our thumbnail, we are ready to record using StreamYard. This step is very easy. All you need to do to get started is go to the platform and click on Create. Then, we will choose Recording.

Then, type in your Title and select “Record locally for each participant”. This tool is going to give you a file for each person present. So, if you’re recording an interview, you will get a video file with just yourself and another video file with just your guest.
When you are ready, click on Create Recording.

The platform will then prompt you to connect your camera and microphone. If you have the paid version of StreamYard, you will be able to use up to 1080p using the dropdown.
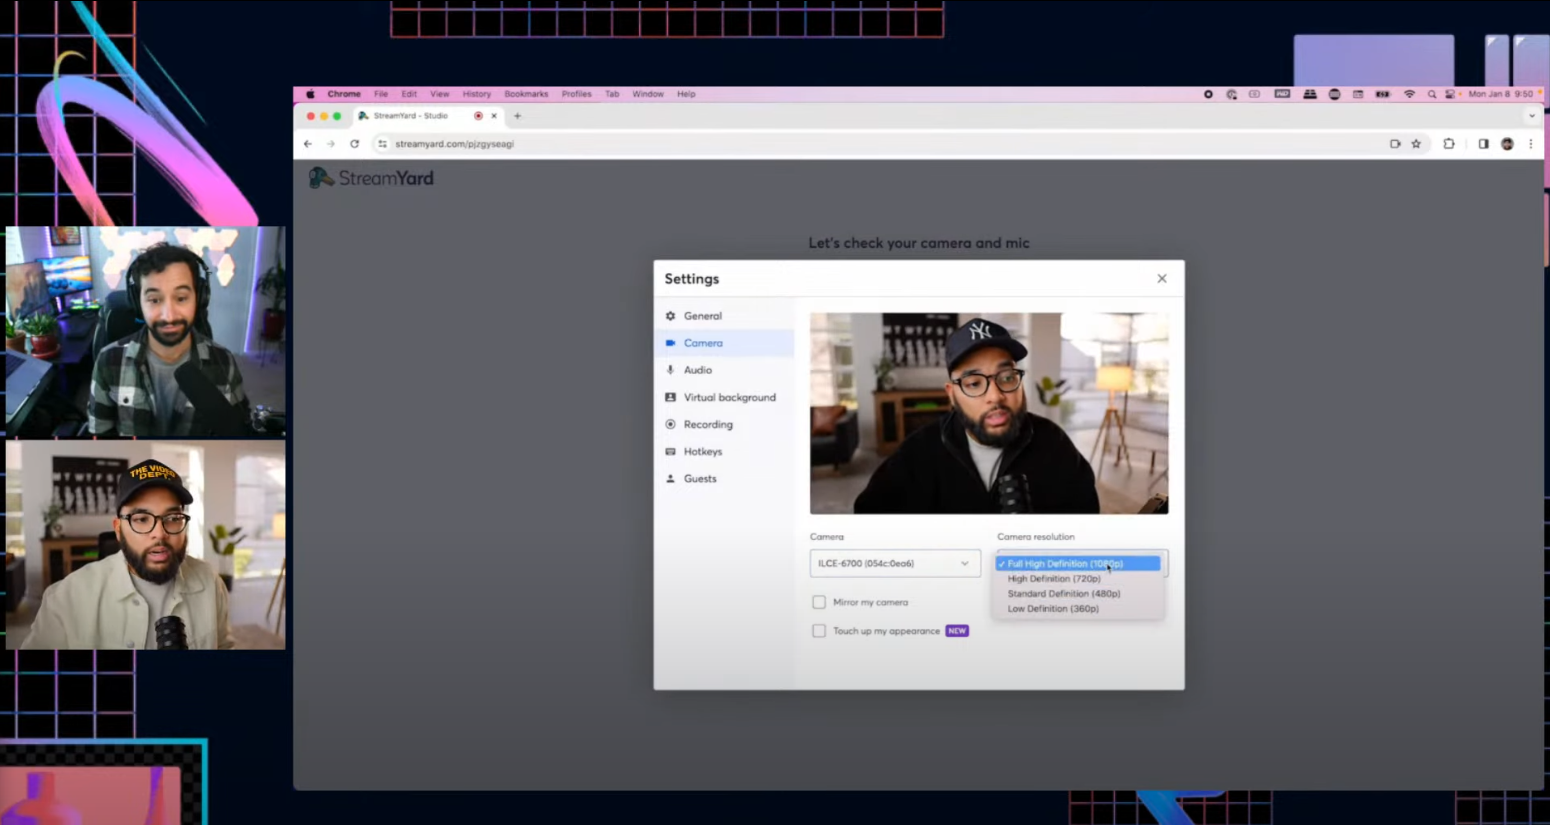
So, make sure both the correct camera and microphone are selected (especially if you’re using a laptop that has its own ones!), choose a Display Name, and click on Enter Studio.
Some of the Cool Things You Can Do In StreamYard
StreamYard comes with many tools you can use to improve the look of your recording. For example, you can add comments, banners, chat functionality, and more.
With banners, for example, you can reinforce your main talking points and add CTAs. O you can pre-plan ad Ad banner and let it show automatically, so you don’t have to worry about them in editing:

This is all done in real-time, so you can change the text, colors, style, and much more without leaving StreamYard!

Another thing you can do is add your logo overlays and backgrounds. That’s right! You can create things in Adobe Express, import them into StreamYard, and drop them into your stream. In fact, you can do the same with videos, too.
Say you created a separate video on your own time. With StreamYard, you can run that video promo, and you wouldn’t have to think about it in post-production.
Virtual Conversations In StreamYard
The first thing you will need to do to invite someone is send a link to your guest.
On the bottom of the screen, you will see an option called Invite. Clicking on it opens a popup with an address. Just copy that address and send it to your guests (you can even email it directly from StreamYard).

This link will give people access to the studio you have created so they can just… pop in!

A lot of people leave it here, with the “Zoom-look”. However, it can be a good idea to fill in the frame with the guests. For example, here’s what the screen would look like if you choose the Cropped Layout style:
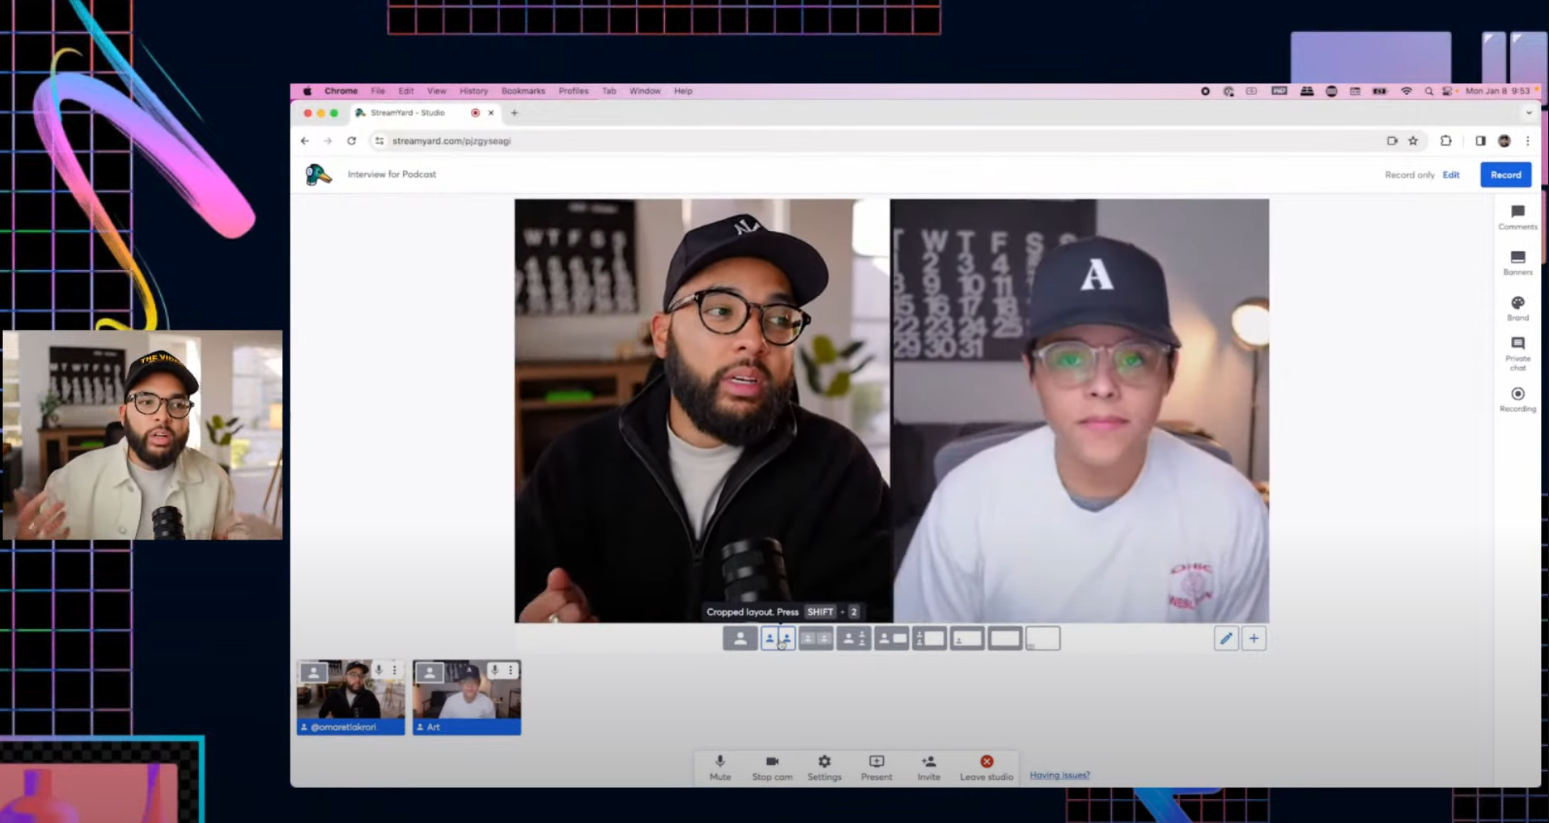
Once you’ve invited your guest and you’re ready to hit record, all you need to do is click on Record. Simple as that!
After you have ended the recording, you can actually check everything looks alright by going to View Recordings. You can also see how each guest has its own file, both of which have been already uploaded:
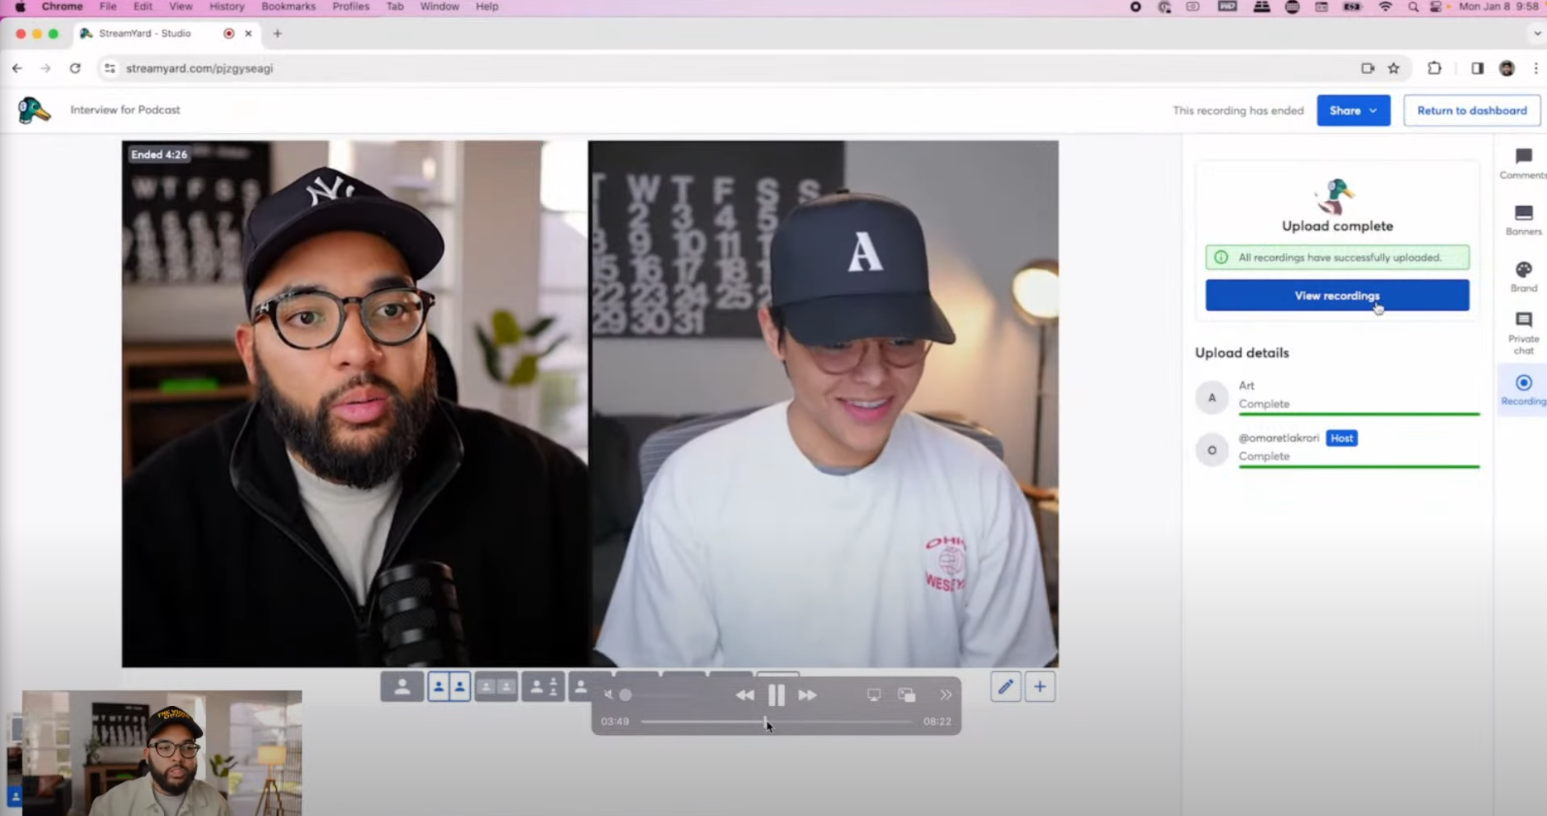
Depending on the quality you choose, it may take a little time to process. However, you will be able to see:
-
Your main file which has both of you on screen.
-
Your guest’s file.
-
Your file.
So, before we move on to Step 3, let’s download all of these files by clicking on each Download button.

Step 3: Editing in Premiere Pro Using AI
Now that we’ve got our three files (and we’ve checked them locally and possibly renamed them for clarity), we will open Adobe Premiere Pro.
We won’t go into all the nitty-gritty details of how to edit videos in Premiere, but we definitely want to share how you can use AI to improve your workflow. So, let’s first start a new project and save it in the folder where our downloaded files are. Then, we will need to import the media we just created in StreamYard into it.
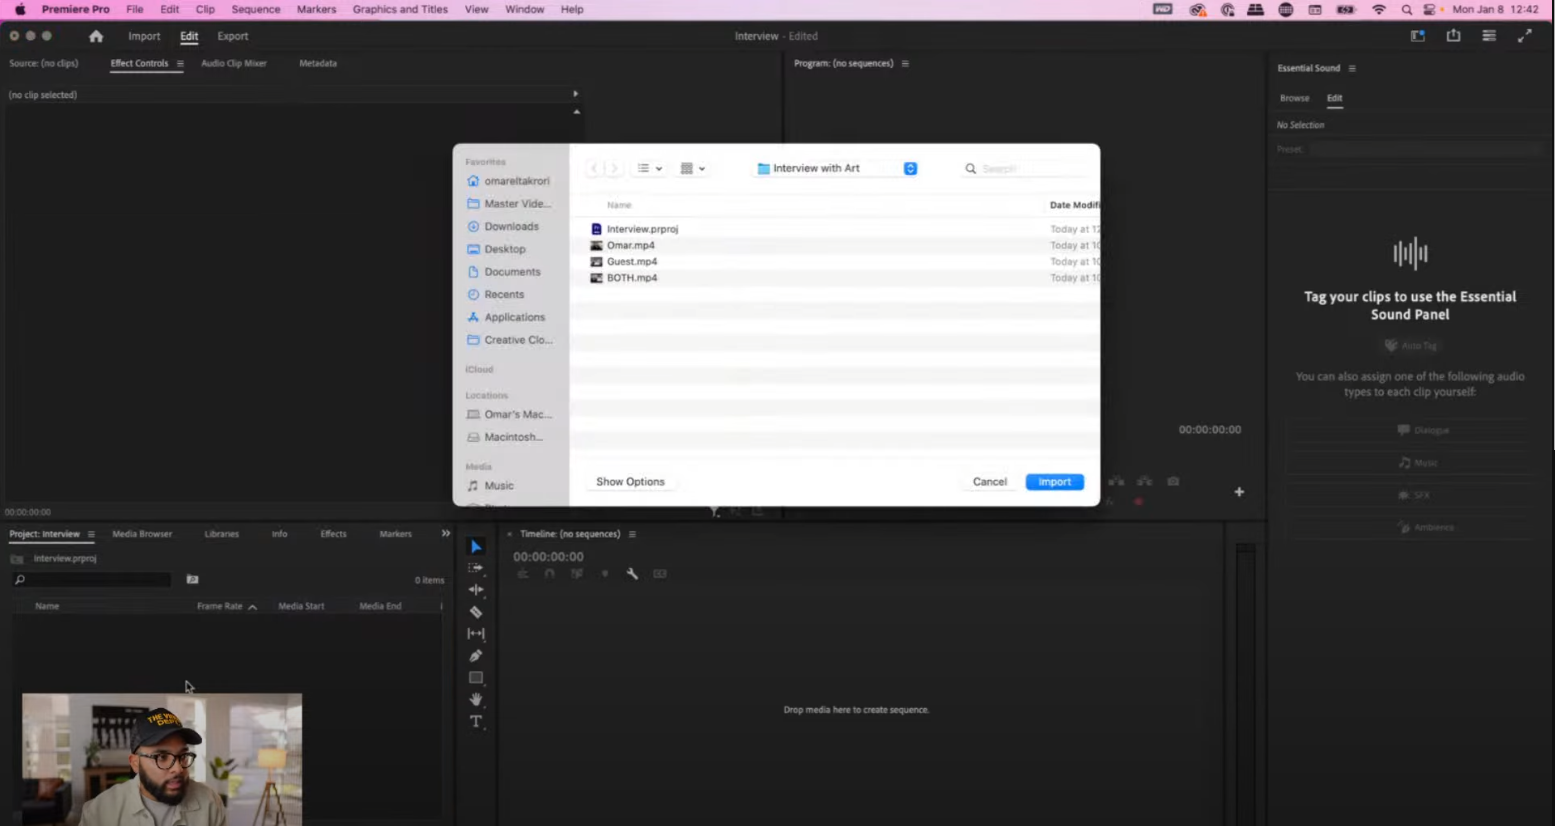
The easiest way to start a new sequence with the correct settings is to simply drag one of the files into the timeline. Let’s say, your own file. Then, drag your guest on top and then the file that has both of you.
Synchronizing and Cleaning Audio
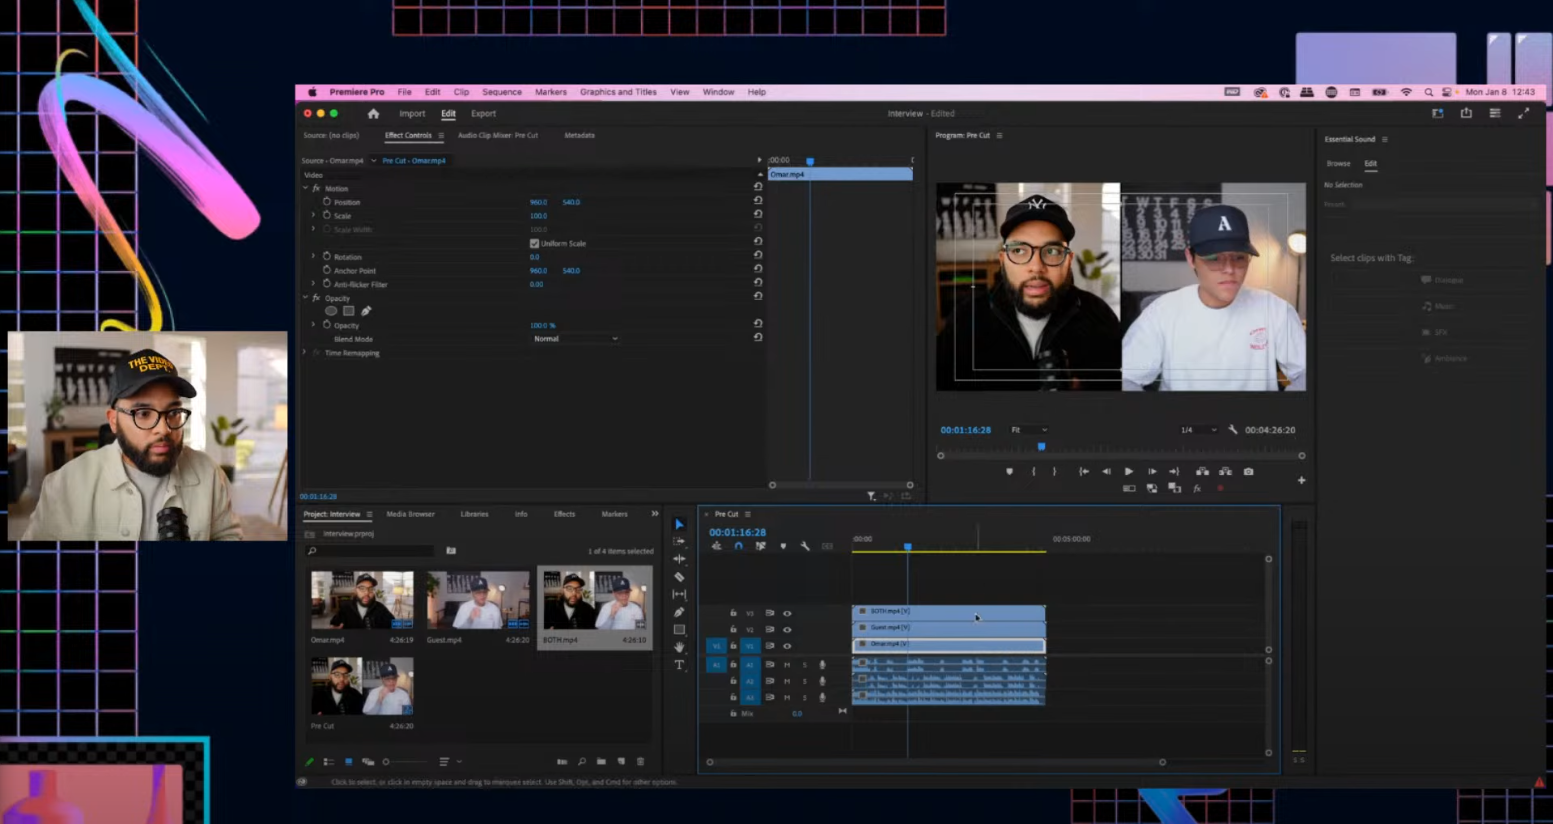
Remember to synchronize them, too. You can do this by selecting all the videos in your timeline, right-clicking, and selecting Synchronize. We will also delete the last audio (that has both people), as we won’t need it, and cut off the bits of the beginning and the end that are out of sync. This is very important for the AI step!
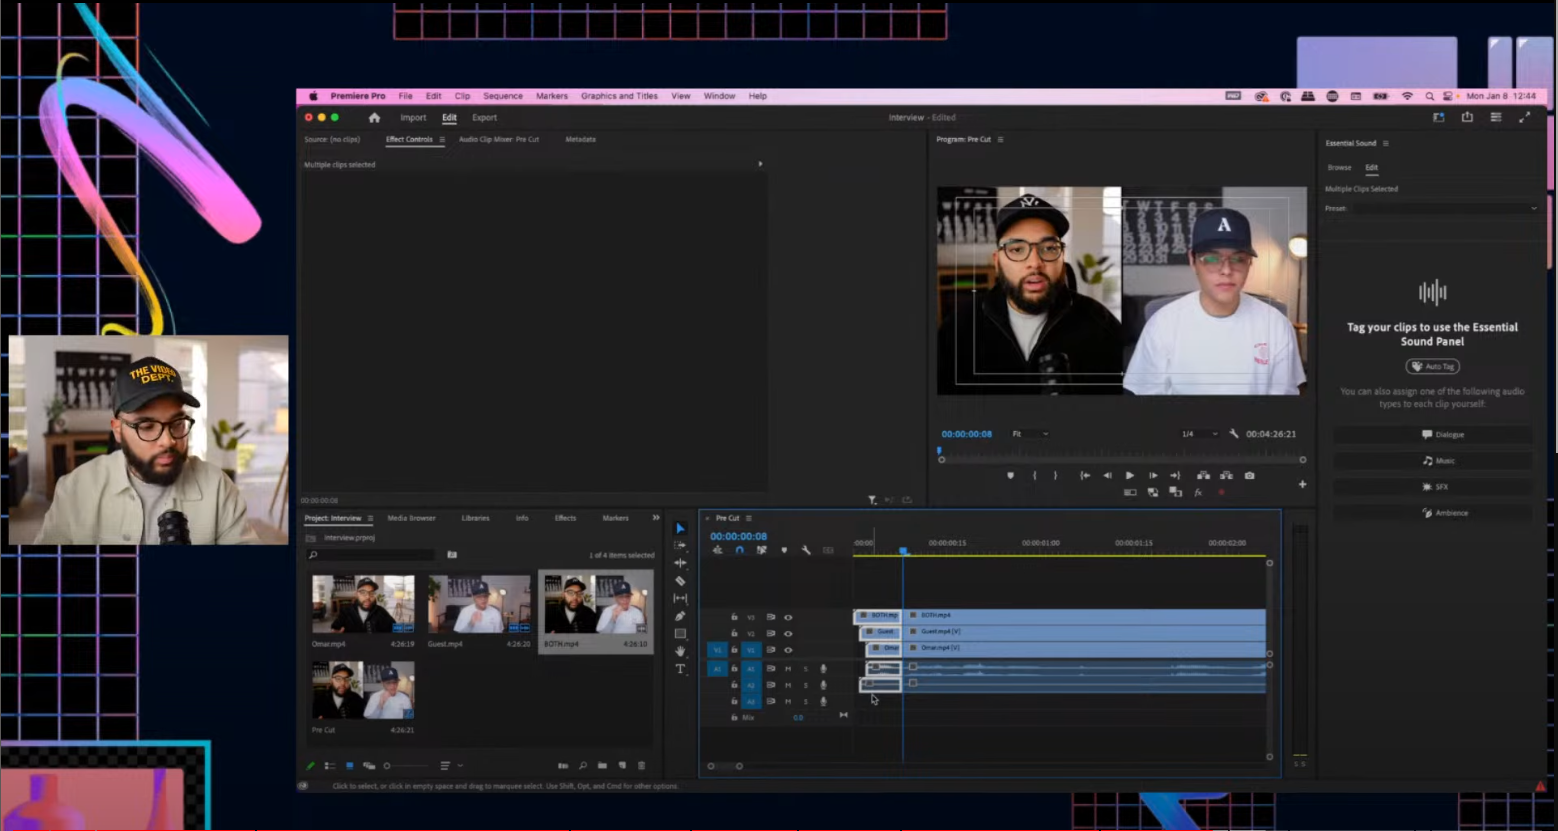
Now our project is ready to be cut. But first, let’s unlink everything by right-clicking and going to Unlink.
We will also tweak some things in Essential Sound (if you don’t see it, you can show it by going to Window > Essential Sound). This tool can help your audio sound much better. In this case, our guest was using his laptop microphone. So, select the go to Dialog > Podcast Voice. And that’s it! Premiere has automatically improved it.

Using the AutoPod Extension
Adobe Premiere has recently started supporting an extension or plugin called AutoPod. If you have a podcast, the subscription is definitely worth the $30 a month it costs because what this does is edit your video to show who is talking. In other words, it cuts the sequences for you!
The AutoPod plugin includes the AutoPod Multi-Camera Editor, the AutoPod Social Clip Creator, and the AutoPod Jump Cut Editor.
You can try AutoPod for free and see if it’s worth the investment. Once you have installed it, then go to Extensions > AutoPod Multicamera Editor. You will then see this box:

This extension is fairly simple to use, too.
For Cutting Method, we will choose Standard. For Multi-Shot Frequency, or how many times the video will go to a different angle, you can do Low, Medium, or High (we will choose Medium).
It’s also important to select the number of cameras (in this case, three), the audio track we want to use (you can add the name of your guests here), and the speakers you want to tag. For the sake of this tutorial, just make sure the correct name goes with the correct channel.
Once you’ve done this, click on Create Multi-Cam Edit… and watch AI create the video for you!

Conclusion
By integrating AI into your workflow, you can put the time into the things that really matter when it comes to video making and podcasting: Creating hooks, conversing with your guests, and growing your brand.
One of the key capabilities of StreamYard is its ease of use. It truly doesn't matter if you're a seasoned content creator or just starting out. Our intuitive tools make it easy to get started and create professional-looking broadcasts in no time. As we have covered, with just a few clicks, users can set up their streams, invite guests, and customize their broadcasts with branded graphics and overlays.
The best way to learn how easy it is to use StreamYard is to try it - which you can do for free! We assure you you will be able to produce your podcast in under an hour. The barrier of entry, as we have shown in this article, is very low. So, what are you waiting for?
Omar El-Takrori is a content creator, podcaster, and entrepreneur coach helping business owners grow their brands with video. He hosts "The Dept." podcast and is also the host of "Build Your Tribe | Grow Your Business with Social Media" on YouTube.
Paco Siller is a studio manager and video producer for Adobe Live. He is the lead content producer at Adobe, where he serves as a producer, livestream director, and video producer for various Adobe Live events.